> For the complete documentation index, see [llms.txt](https://docs.acestudio.ai/llms.txt). Markdown versions of documentation pages are available by appending `.md` to page URLs; this page is available as [Markdown](https://docs.acestudio.ai/instruments/third-party-instruments.md).
# Third-Party Instruments
Load third-party VST3 and AU instrument plug-ins on Instrument Tracks in ACE Studio.
ACE Studio hosts third-party instrument plug-ins — synths, samplers, and sound libraries in **VST3** or **AU** format — right alongside its AI instruments. Load a plug-in from the **Plugins** tab of the [Instrument Library](/instruments/instrument-library.md), and the track becomes an **Instrument Track** that plays MIDI clips the way any DAW does.
***
### Supported formats
| Format | Windows | macOS |
| -------------------- | ------- | ----- |
| **VST3** | ✓ | ✓ |
| **AU** (Audio Units) | — | ✓ |
* Only **64-bit** plug-ins are supported.
* On Apple Silicon Macs, plug-ins run **natively**.
* ACE Studio fully scans the standard plug-in folders on its first launch and picks up changed files on later launches. For scan locations and how to re-scan, see [Preferences](/account-and-settings/preferences.md#plugins).
***
### Loading a plug-in
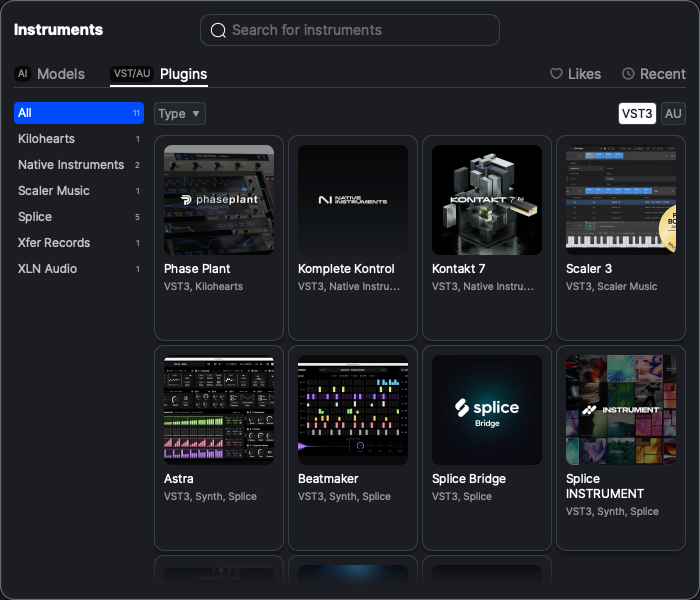
Open the Instrument Library and switch to the **Plugins** tab. On Windows the tab is labeled **VST Plugins**; on macOS it is **VST/AU Plugins**.
* **Vendor list** — the column on the left groups plug-ins by manufacturer, with a count next to each name. **All** is selected by default. Search and the Type filter apply within whichever vendor you pick.
* **Type** — filter by category, such as Synth or Sampler. Only VST3 plug-ins can be filtered this way.
* **VST3 / AU** — on macOS, switch between the two formats. ACE Studio remembers your choice.
Each card shows the plug-in image, its name, and a subtitle with the format, type, and vendor, such as *VST3, Synth, Xfer*. AU plug-ins show format and vendor only. Hover a long name to see it in full.
To load a plug-in, do one of the following:
* Drag the card onto an empty area of the canvas to create a new track.
* Drag the card onto a track header. Dropping onto an existing Instrument Track or AI Instrument Track replaces its sound source.
* Click the card, then click the canvas where you want the track.
To remove a plug-in from a track, right-click the track header and choose **Unload**.
***
### The Instrument Track
An Instrument Track is one of the sub-types of [MIDI Tracks](/project/arrangement-in-canvas/tracks/midi-tracks.md). It holds MIDI clips like a Vocal Track or an AI Instrument Track, but behaves differently in two ways:
* **Track header** — clicking the track picture opens the plug-in's own window instead of a sound source panel.
* **Piano Roll** — the Clip Editor shows standard MIDI editing. See [Velocity and MIDI CC](#velocity-and-midi-cc) below.
***
### The plug-in window
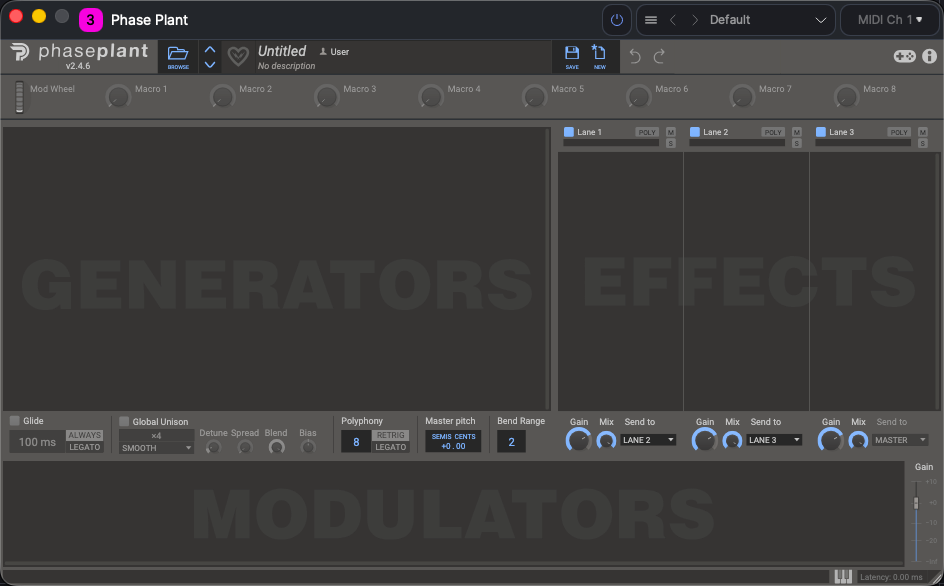
Click the track picture to open the plug-in window. ACE Studio adds a compact header above the plug-in's own interface:
* **Power** — turns the plug-in on or off.
* **Preset bar** — step through presets with < / >, see the current preset name, and open the preset menu. Presets work exactly as they do for effect plug-ins, including ACE Studio's `.acefxpreset` format and exporting in the plug-in's native format. See [Preset management](/project/mixing/effects/third-party-effects.md#preset-management).
* **MIDI Ch** — choose which MIDI channel the track sends to the plug-in.
***
### Velocity and MIDI CC
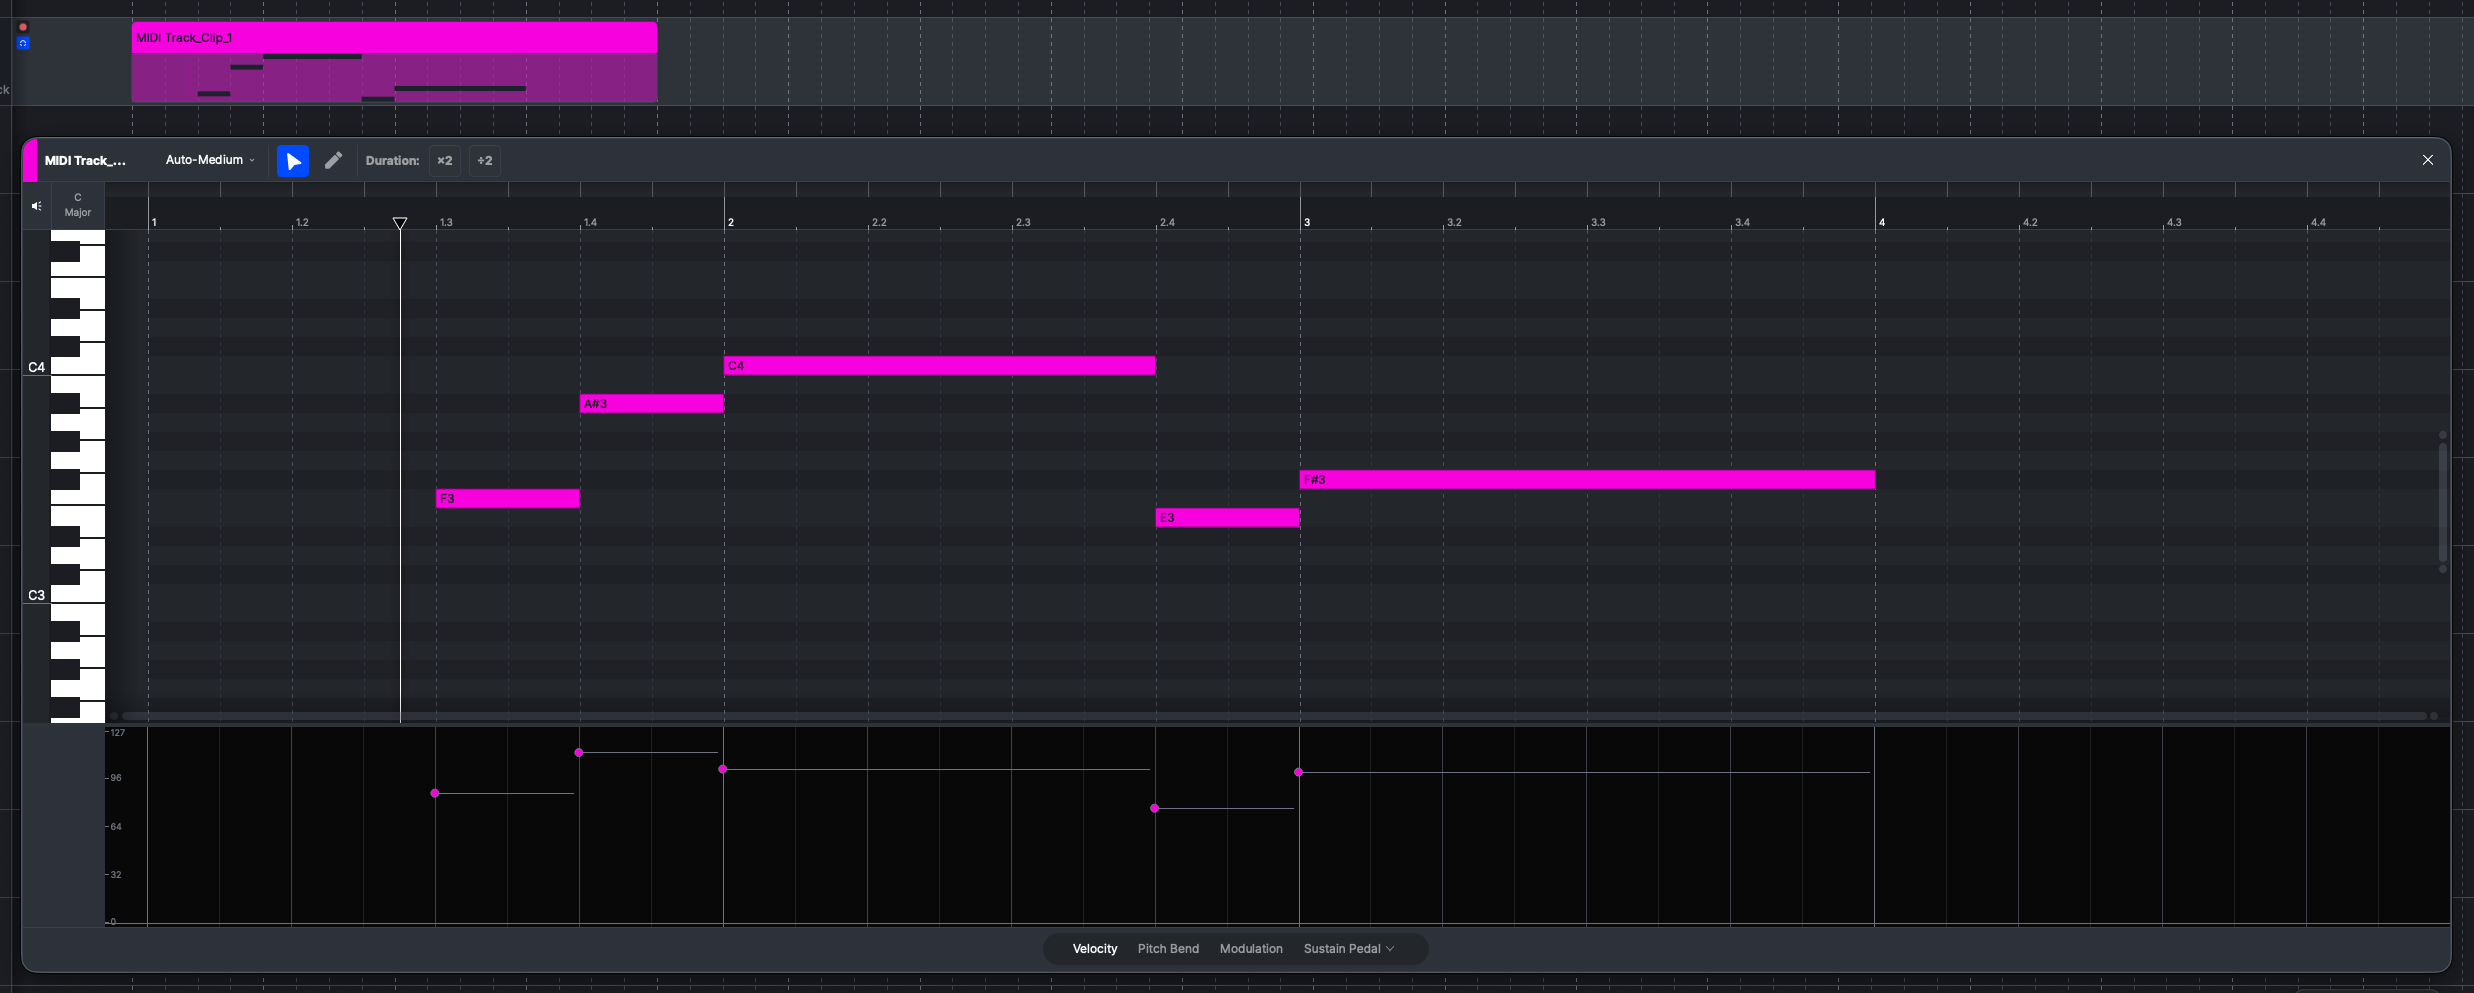
On an Instrument Track, the Piano Roll in the [Clip Editor](/project/arrangement-in-canvas/clips/clip-editor.md) has a controller lane below the notes. Use the selector at the bottom to choose what the lane shows:
* **Velocity** — one bar per note. Drag a bar to change how hard the note is played.
* **Pitch Bend** and **Modulation** — always available.
* **Other controllers** — the last slot is a menu. Pick any other MIDI CC, such as Sustain Pedal or Expression, to show it in the lane. Controllers that already have a fixed slot are greyed out in this menu.
#### Editing a controller curve
A controller curve is a series of anchor points joined by straight lines. When a lane has no anchors, it shows a dashed line at the controller's default value, and the plug-in receives that default.
With the **pointer** tool:
* Double-click anywhere in the lane to add an anchor, or click on the dashed line to add one there.
* Drag an anchor to move it.
* Double-click an anchor to delete it.
* Drag a box around several anchors to select them, then delete, copy, or paste them together.
With the **pen** tool, draw directly in the lane to create a continuous curve. In this mode only the line is shown, not the individual anchors.
Delete all anchors and the lane returns to the dashed default line.
---
# Agent Instructions
This documentation is published with GitBook. GitBook is the documentation platform designed so that both humans and AI agents can read, navigate, and reason over technical content effectively. Learn more at gitbook.com.
## Querying This Documentation
If you need additional information that is not directly available in this page, you can query the documentation dynamically by asking a question.
Perform an HTTP GET request on the current page URL with the `ask` query parameter, and the optional `goal` query parameter:
```
GET https://docs.acestudio.ai/instruments/third-party-instruments.md?ask=&goal=
```
`ask` is the immediate question: it should be specific, self-contained, and written in natural language.
`goal` is optional and describes the broader end goal you are ultimately trying to accomplish on behalf of the user. GitBook uses it to tailor the answer towards what is most useful for that goal.
The response will contain a direct answer to the question and relevant excerpts and sources from the documentation.
Use this mechanism when the answer is not explicitly present in the current page, you need clarification or additional context, or you want to retrieve related documentation sections.