> For the complete documentation index, see [llms.txt](https://docs.acestudio.ai/llms.txt). Markdown versions of documentation pages are available by appending `.md` to page URLs; this page is available as [Markdown](https://docs.acestudio.ai/docs/product-wiki-ja/hajimeni/tour-the-interface.md).
# インターフェースツアー
ACE Studioのインターフェースをご覧ください。
## タイトルバーとトランスポート
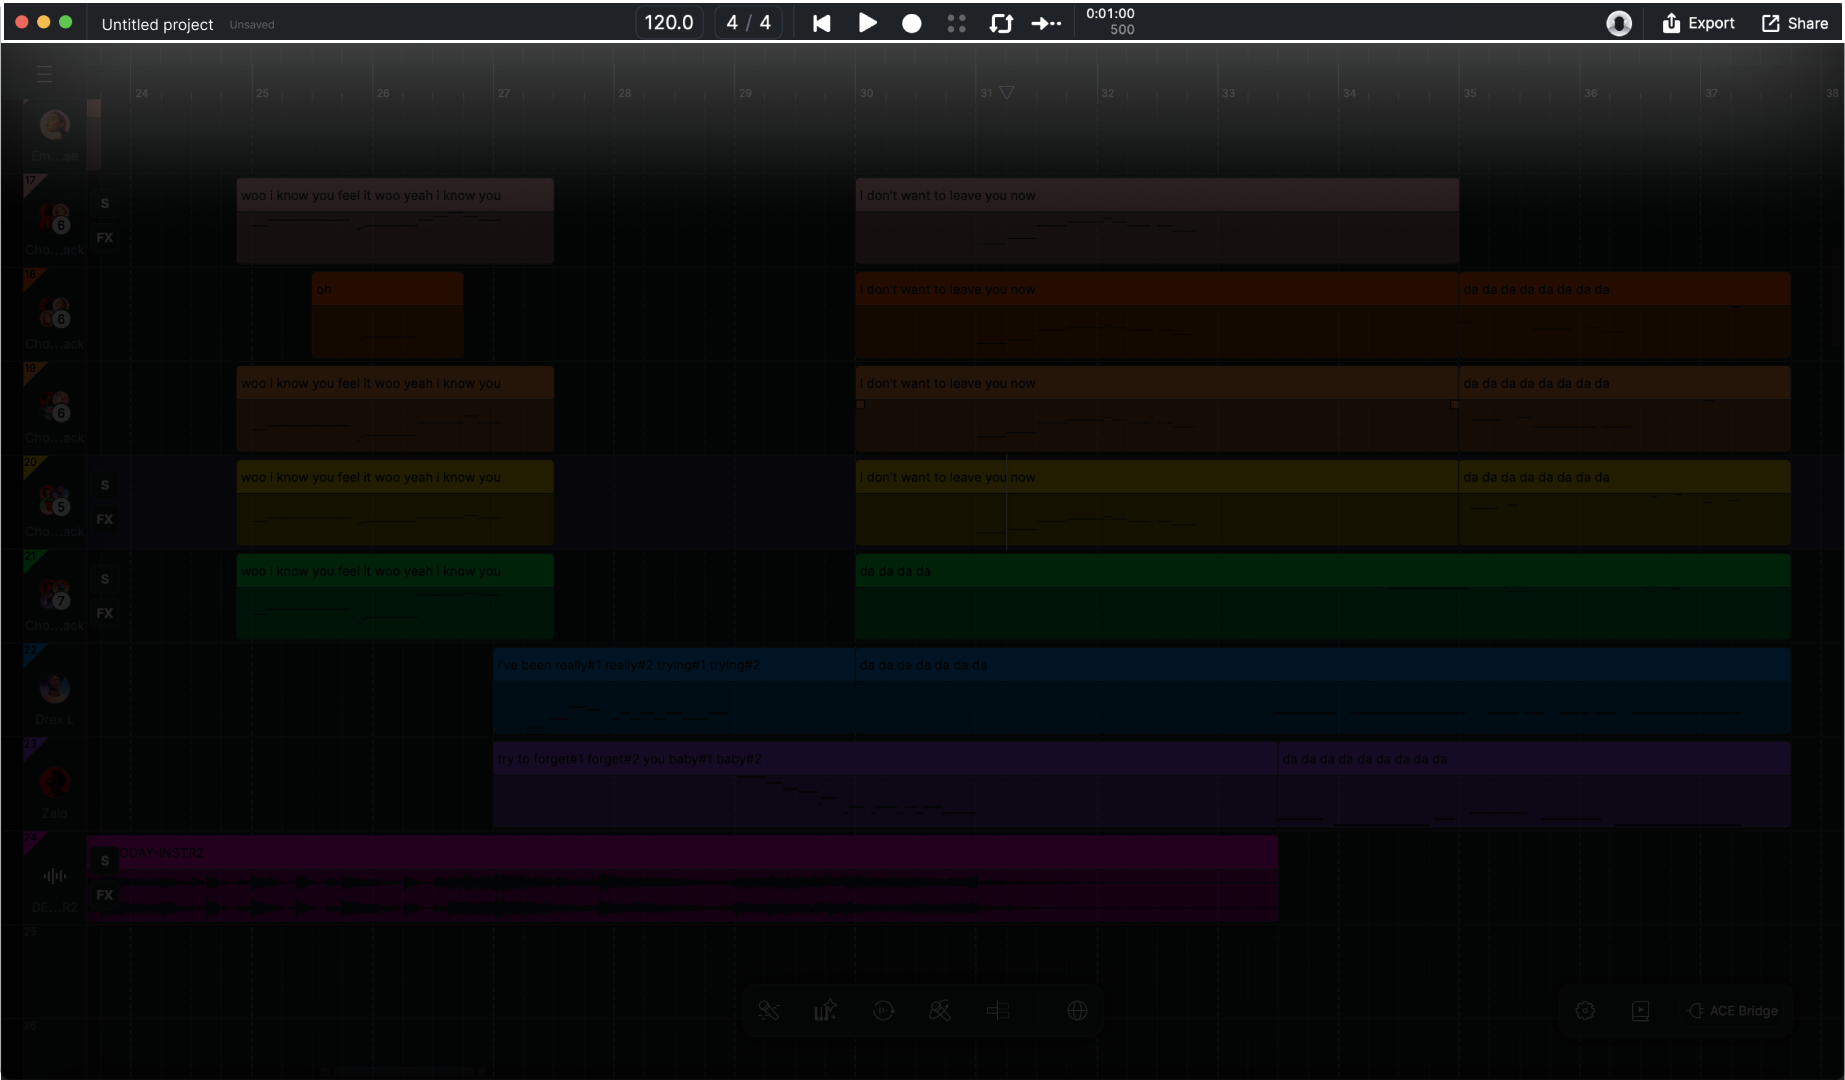
タイトルバーとトランスポートは ACE Studio の上部にあり、プロジェクト名、テンポ、拍子、再生コントロールなどの主要機能を表示します。
{% content-ref url="/pages/a3c935d4784cab9af21fc83353e216f85bf89ae1" %}
[トランスポート](/docs/product-wiki-ja/purojekuto/transport.md)
{% endcontent-ref %}
## キャンバス
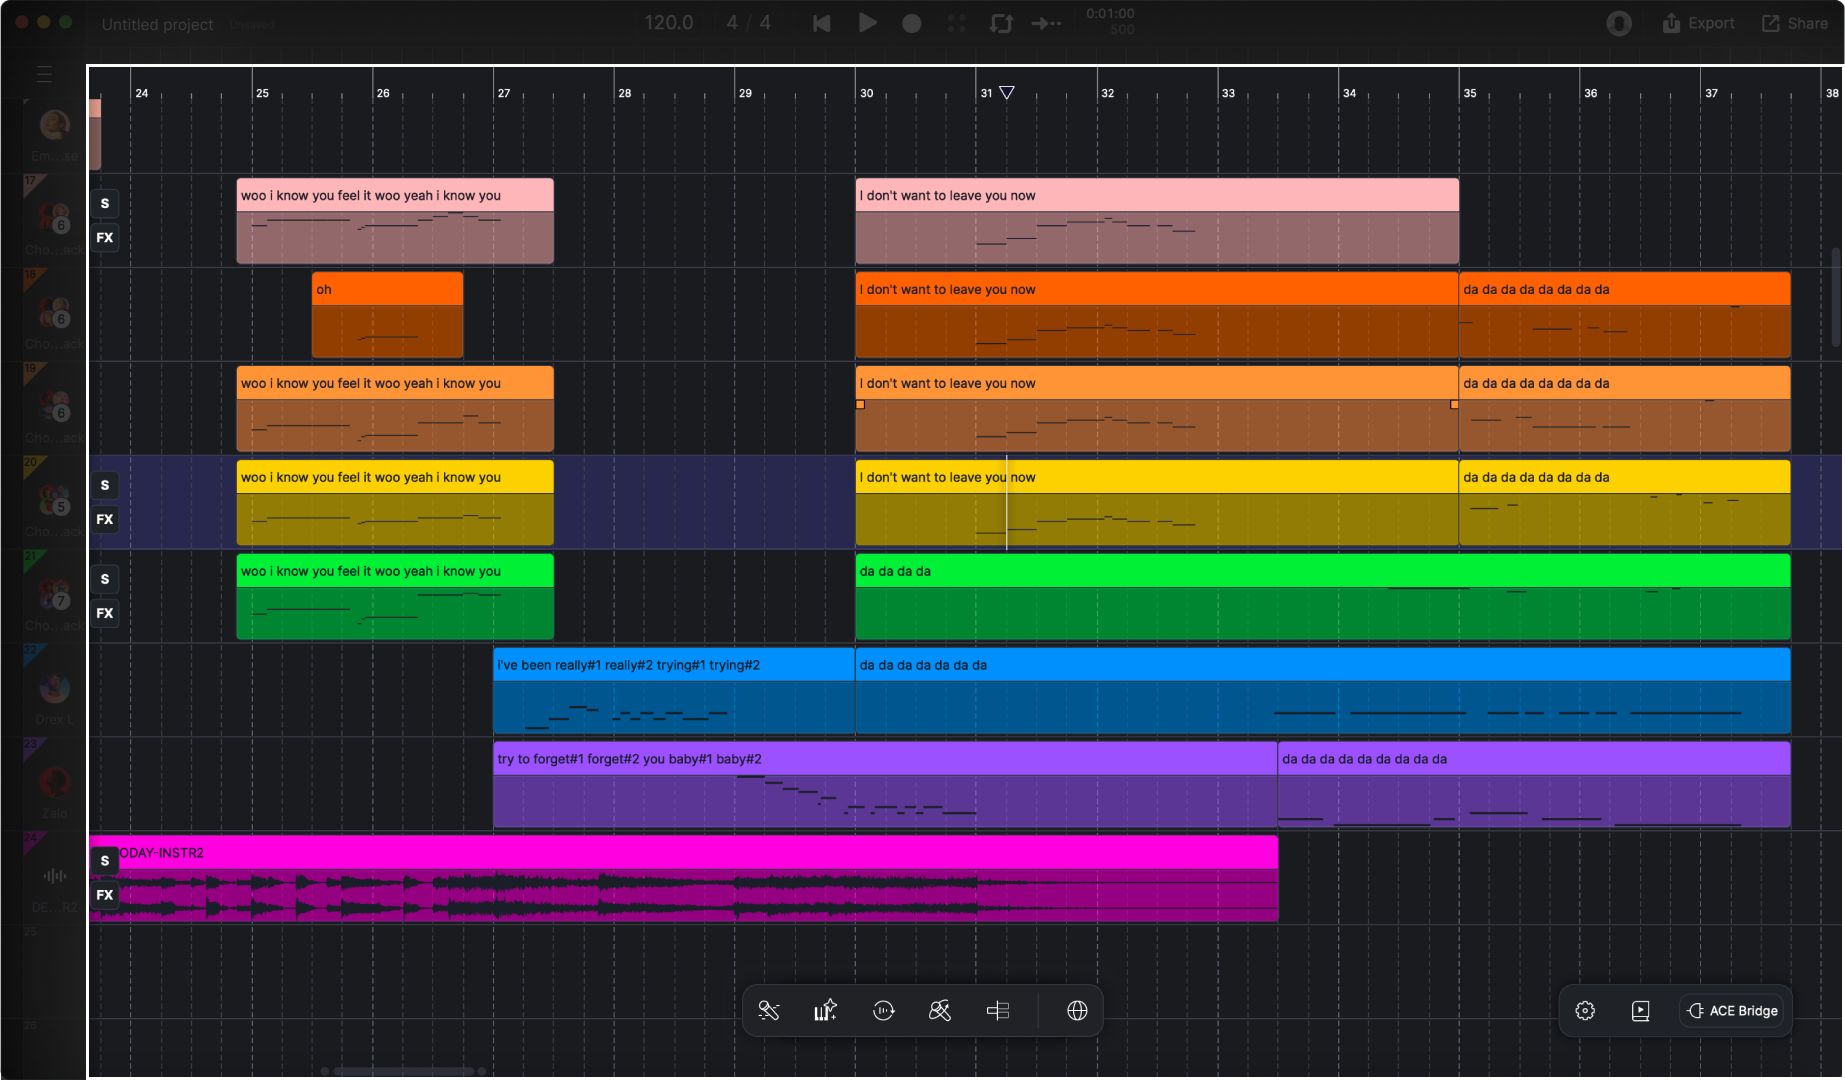
キャンバスは音楽制作の中心エリアで、プロジェクト内のすべてのトラックとクリップをタイムライン形式で表示します。ここでは、さまざまなクリップを作成、移動、トリミング、配置して、楽曲全体の構成を組み立てられます。
{% content-ref url="/pages/f6c787196ad1c5ffa2606d1dbfcb7ba6c2f3df31" %}
[キャンバスでのアレンジ](/docs/product-wiki-ja/purojekuto/arrangement-in-canvas.md)
{% endcontent-ref %}
## クリップエディター
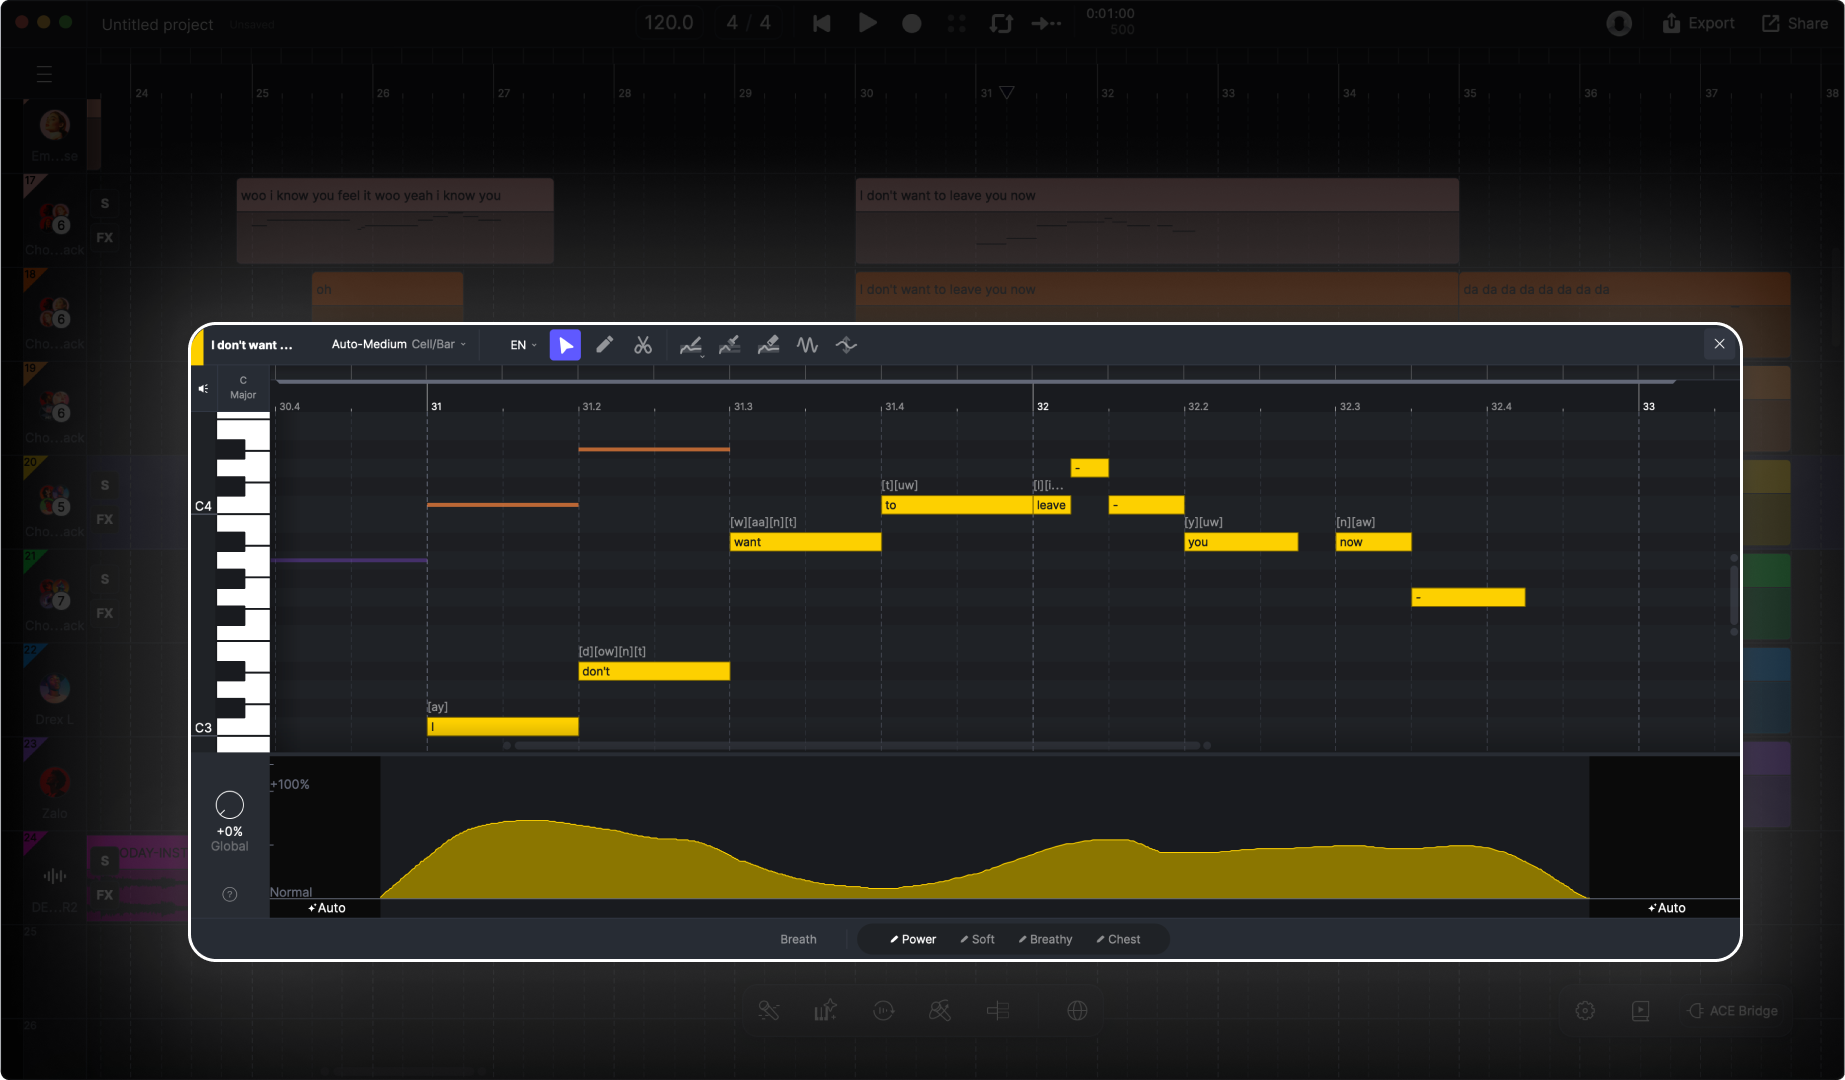
クリップエディターは微調整を行う場所です。クリップをダブルクリックすると下に展開されます。ピアノロールでノート、歌詞、ボーカルコントロールを編集したり、オーディオエディターでオーディオファイルを調整したりできます。
{% content-ref url="/pages/8e3c3e4aa843a36c7b53a62a5513dea55c9ab719" %}
[クリップエディター](/docs/product-wiki-ja/purojekuto/arrangement-in-canvas/clips/clip-editor.md)
{% endcontent-ref %}
## ミキサー
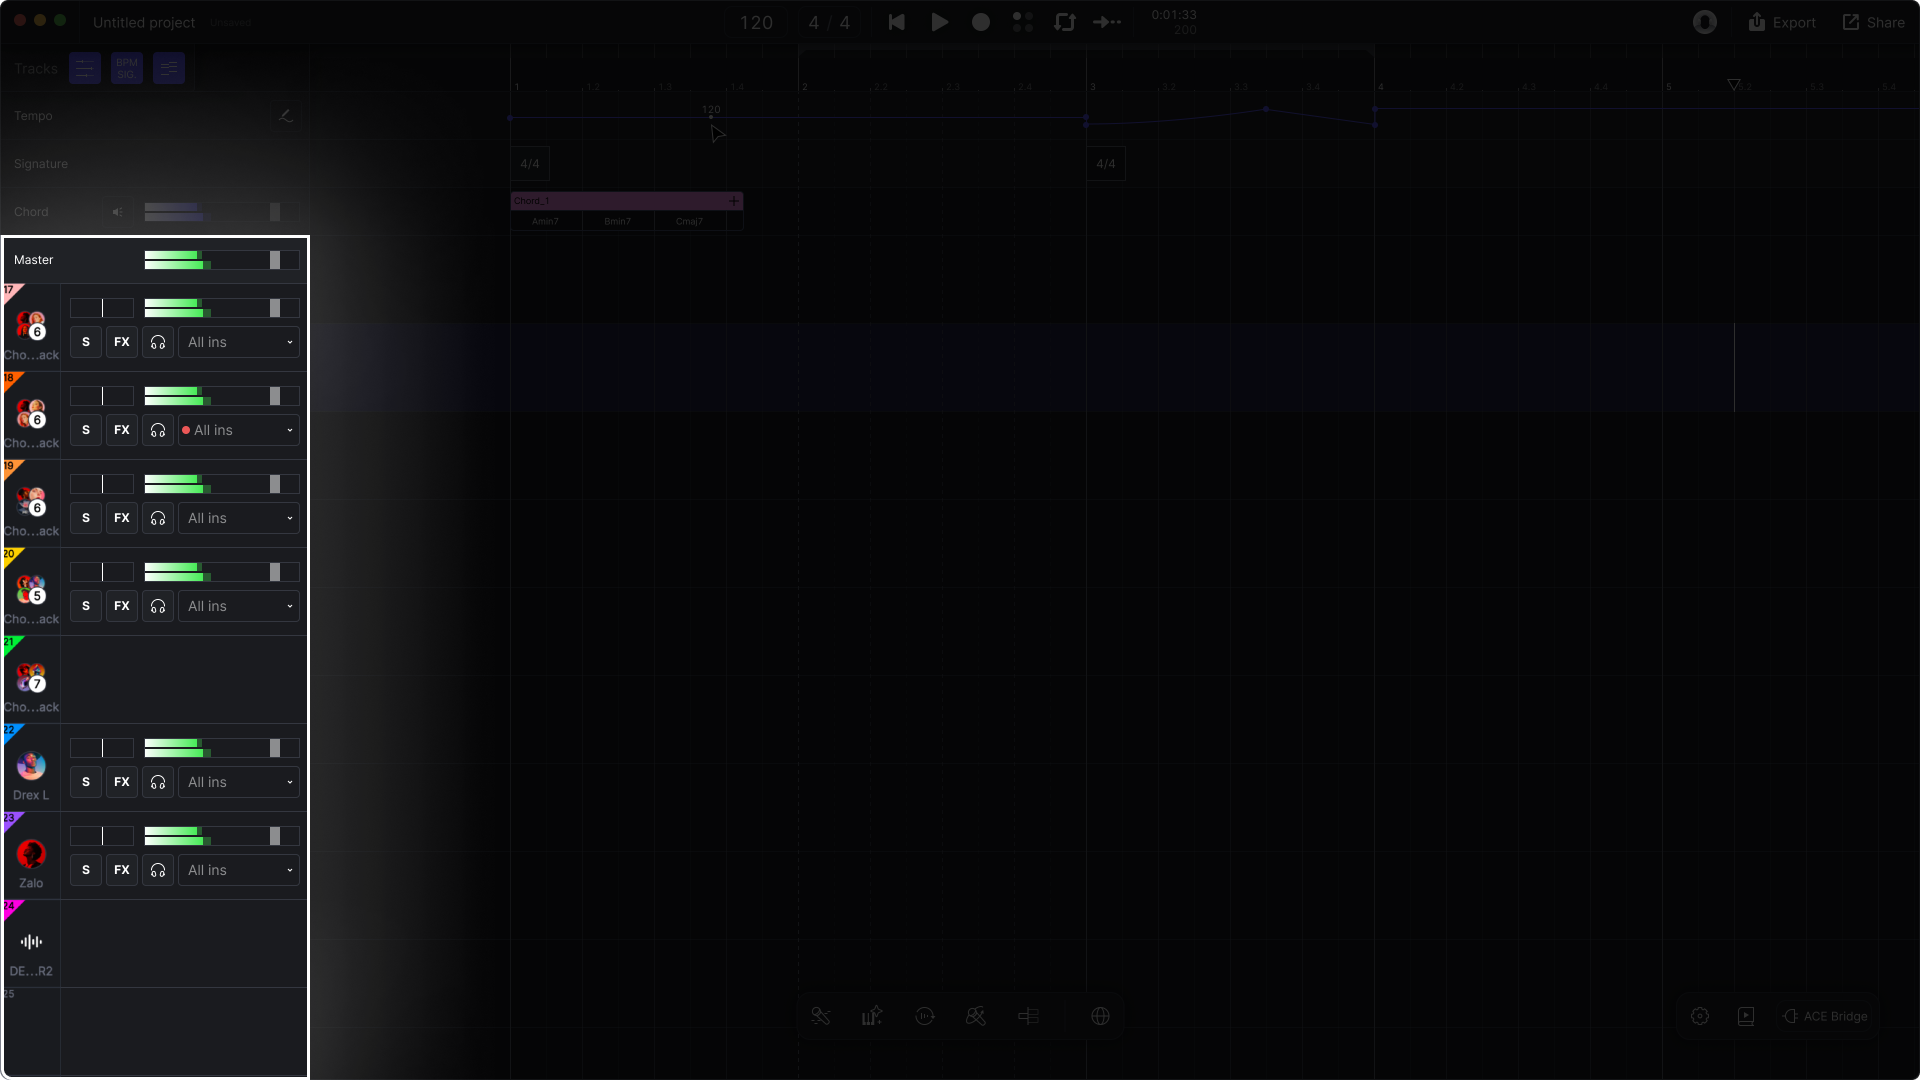
ミキサーでは、各トラックのフェーダーとノブを調整することで、各パートのバランスを簡単に整え、最終ミックスの仕上がりを形作れます。
{% content-ref url="/pages/6efe7a3c8d9dad9777a10f85a0ee7f0354a6f3c1" %}
[ミキサー](/docs/product-wiki-ja/purojekuto/mixing/mixer.md)
{% endcontent-ref %}
## 追加トラック
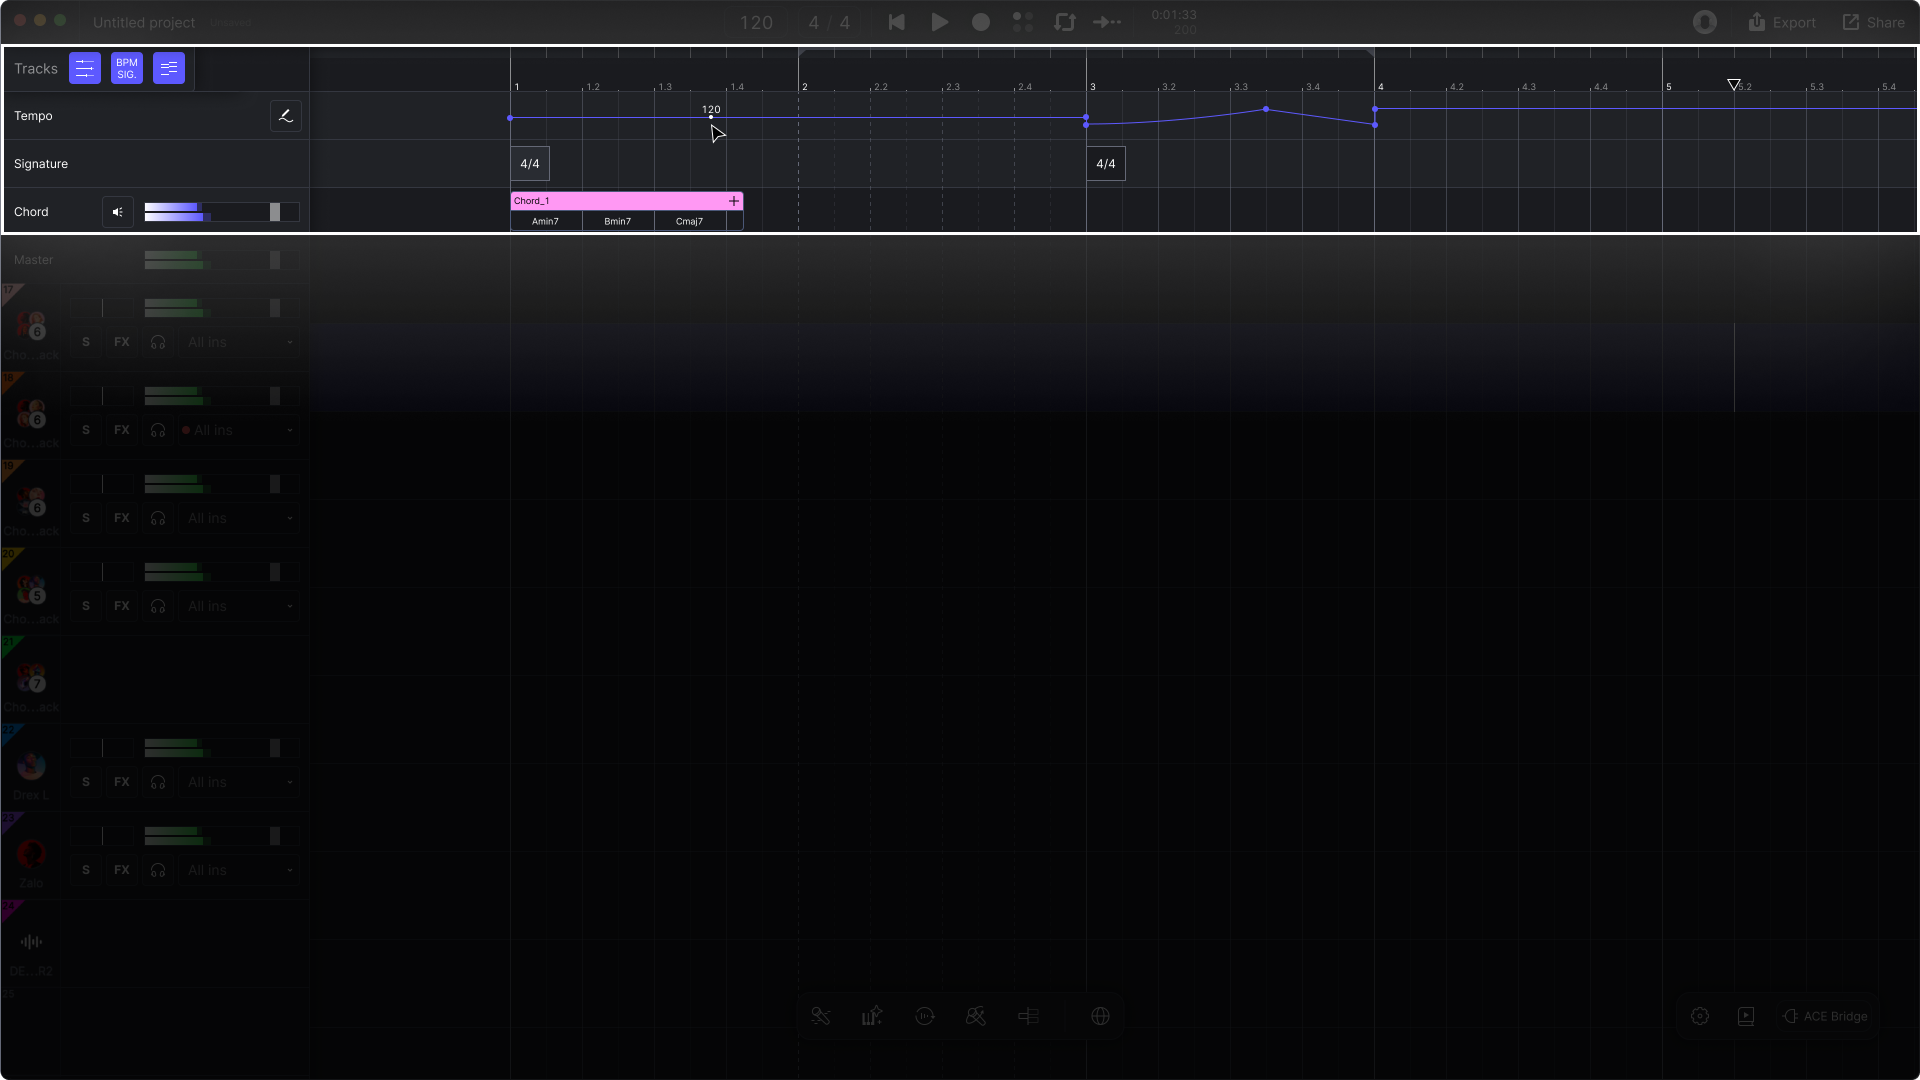
追加トラックはキャンバスの上部に展開でき、プロジェクトのグローバル情報やマーカーを管理できます。これには、拍子トラック、クリックしてテンポトラックを開く、コードトラック、ビデオトラックが含まれ、複雑なリズムの編成に便利です。
{% content-ref url="/pages/3eb84f7d04872c70036a404e85f67a343ab3c028" %}
[テンポと拍子の変更](/docs/product-wiki-ja/purojekuto/arrangement-in-canvas/tempo-and-signature-change.md)
{% endcontent-ref %}
{% content-ref url="/pages/d164cb191d5278cf2b99e1ad05a3e1f557a29130" %}
[コードトラック](/docs/product-wiki-ja/purojekuto/arrangement-in-canvas/chord-track.md)
{% endcontent-ref %}
{% content-ref url="/pages/4d6840dc00e32c4e237afbaa3f88e5856e1e9905" %}
[ビデオトラック](/docs/product-wiki-ja/purojekuto/arrangement-in-canvas/video-track.md)
{% endcontent-ref %}
## Fxパネル
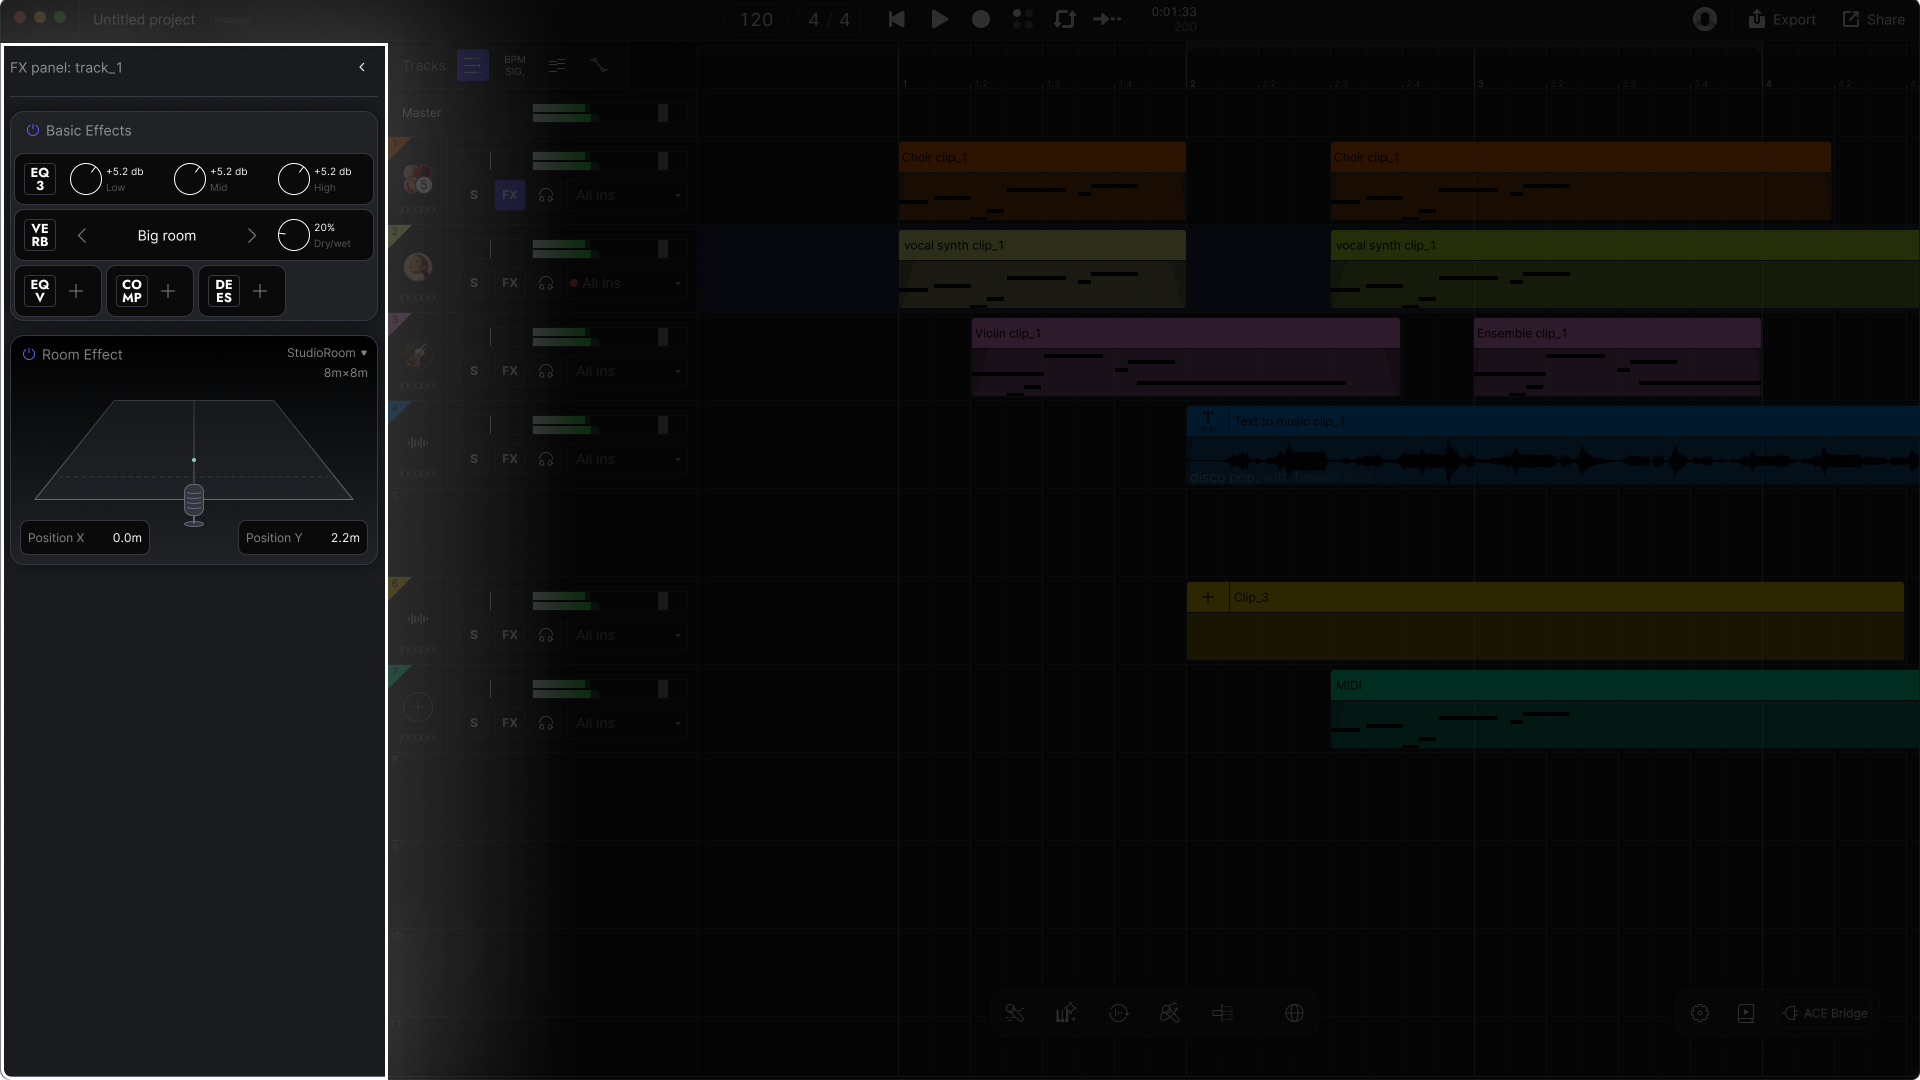
エフェクトパネルは、サウンドに「味付け」を加える場所です。ここでは、各トラックのエフェクトプラグインを読み込んで調整できます。リバーブ、イコライザー、コンプレッション、Room Effect などのエフェクトを使うことで、トラックの音色を変化させ、強化できます。
{% content-ref url="/pages/58a2fe778e8fd9ea11f08dd8f698c7a07dfe4bdb" %}
[エフェクト](/docs/product-wiki-ja/purojekuto/mixing/effects.md)
{% endcontent-ref %}
## メインメニュー
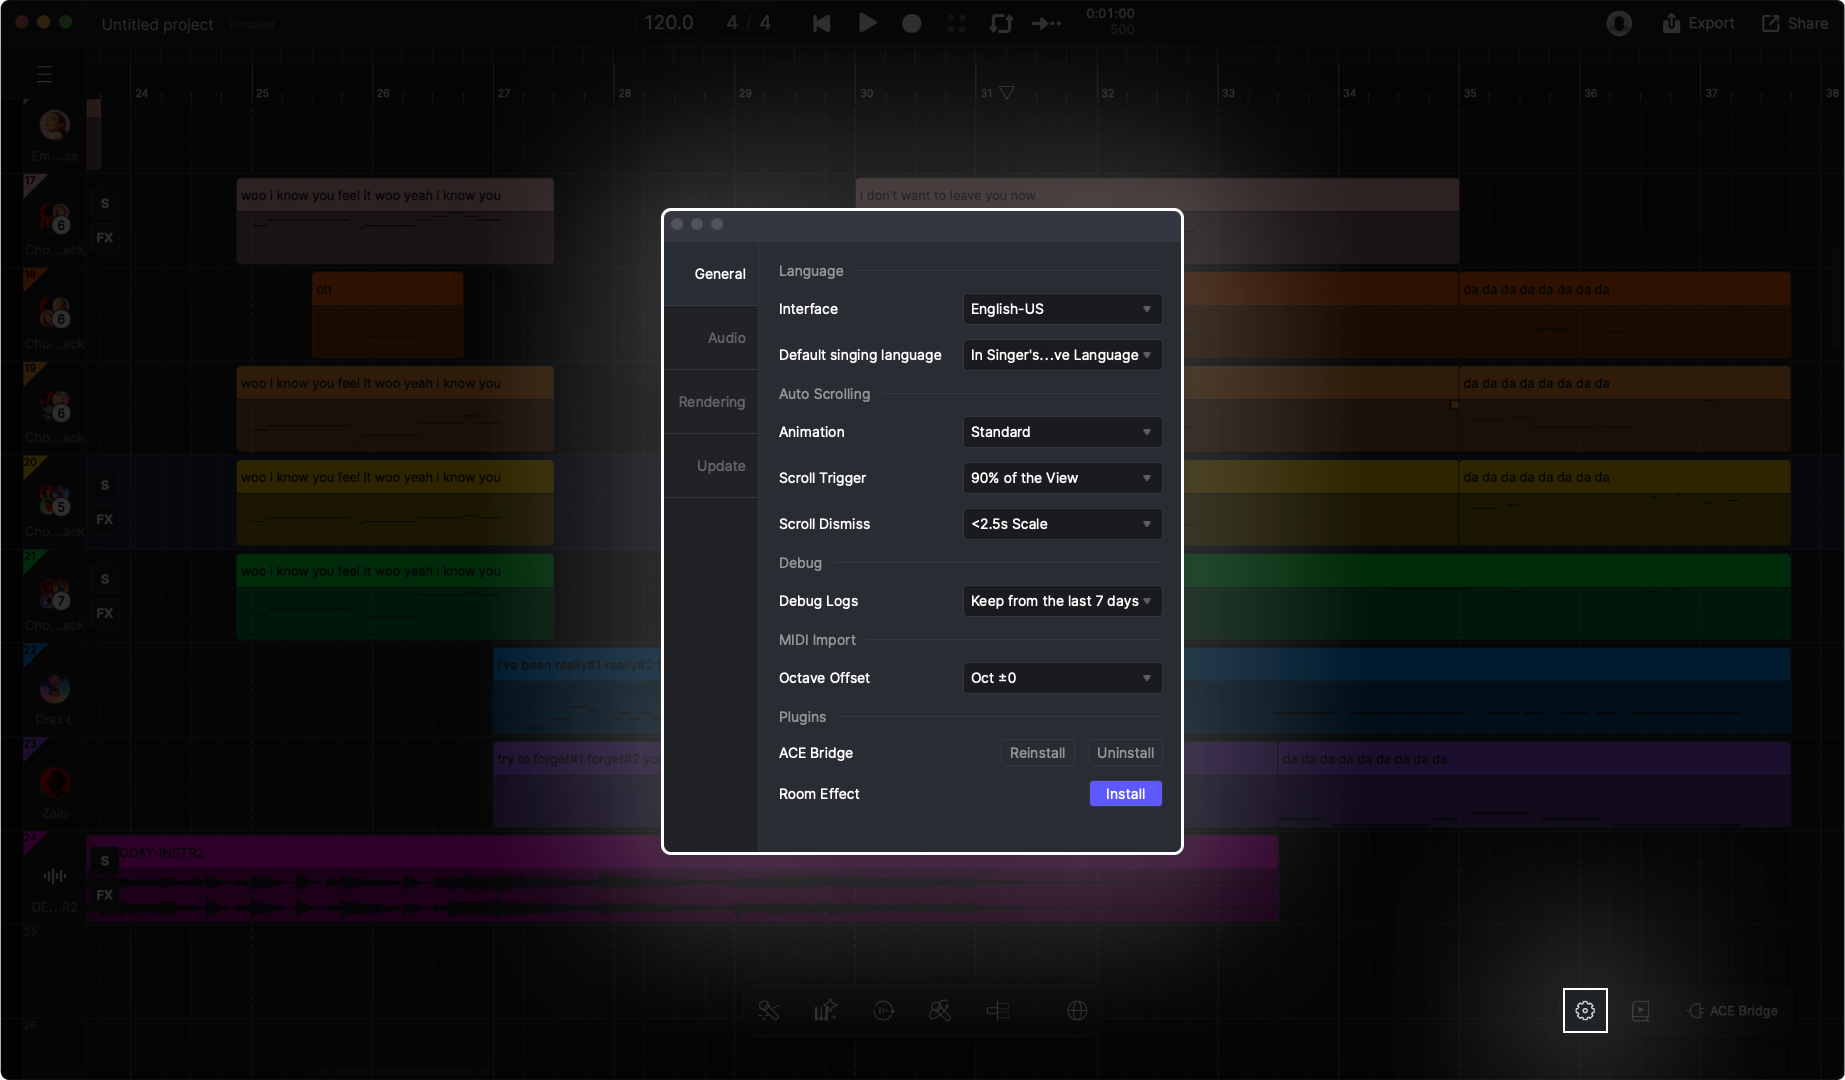
メインメニューは ACE Studio インターフェイスの左上にあります。ここでは、ファイル管理、編集操作、設定オプションなど、すべてのコマンドを確認できます。
{% content-ref url="/pages/75bac93cc63f590f9cbf110168481deeec70d936" %}
[ファイル管理](/docs/product-wiki-ja/purojekuto/file-management.md)
{% endcontent-ref %}
{% content-ref url="/pages/d4d2d7858be46c9eedecb6e582ed65578644d127" %}
[設定](/docs/product-wiki-ja/akauntoto/preferences.md)
{% endcontent-ref %}
---
# Agent Instructions
This documentation is published with GitBook. GitBook is the documentation platform designed so that both humans and AI agents can read, navigate, and reason over technical content effectively. Learn more at gitbook.com.
## Querying This Documentation
If you need additional information that is not directly available in this page, you can query the documentation dynamically by asking a question.
Perform an HTTP GET request on the current page URL with the `ask` query parameter, and the optional `goal` query parameter:
```
GET https://docs.acestudio.ai/docs/product-wiki-ja/hajimeni/tour-the-interface.md?ask=&goal=
```
`ask` is the immediate question: it should be specific, self-contained, and written in natural language.
`goal` is optional and describes the broader end goal you are ultimately trying to accomplish on behalf of the user. GitBook uses it to tailor the answer towards what is most useful for that goal.
The response will contain a direct answer to the question and relevant excerpts and sources from the documentation.
Use this mechanism when the answer is not explicitly present in the current page, you need clarification or additional context, or you want to retrieve related documentation sections.