> For the complete documentation index, see [llms.txt](https://docs.acestudio.ai/llms.txt). Markdown versions of documentation pages are available by appending `.md` to page URLs; this page is available as [Markdown](https://docs.acestudio.ai/docs/product-wiki-ja/aijento/external-agent-access/claude-desktop-and-cowork.md).

# Claude Desktop & Cowork

Claude Desktop（Chat & Cowork）をMCP経由でACE Studioに接続します。

Claude Desktop をローカルの MCP（モデル コンテキスト プロトコル）サーバー経由で ACE Studio に接続し、Claude から直接、音楽プロジェクトを確認、アレンジ、編集できます。

{% hint style="info" %}
このガイドでは、設定方法を順に説明します **Chat** と **Cowork** Claude Desktop で。

使用しているのが **Code** モード（Claude Code）の場合は、別の設定を使用します。次へ進んで [外部エージェントアクセス](/docs/product-wiki-ja/aijento/external-agent-access.md) エージェントが自動的に設定できるようにするか、 `claude mcp add` ターミナルコマンド。
{% endhint %}

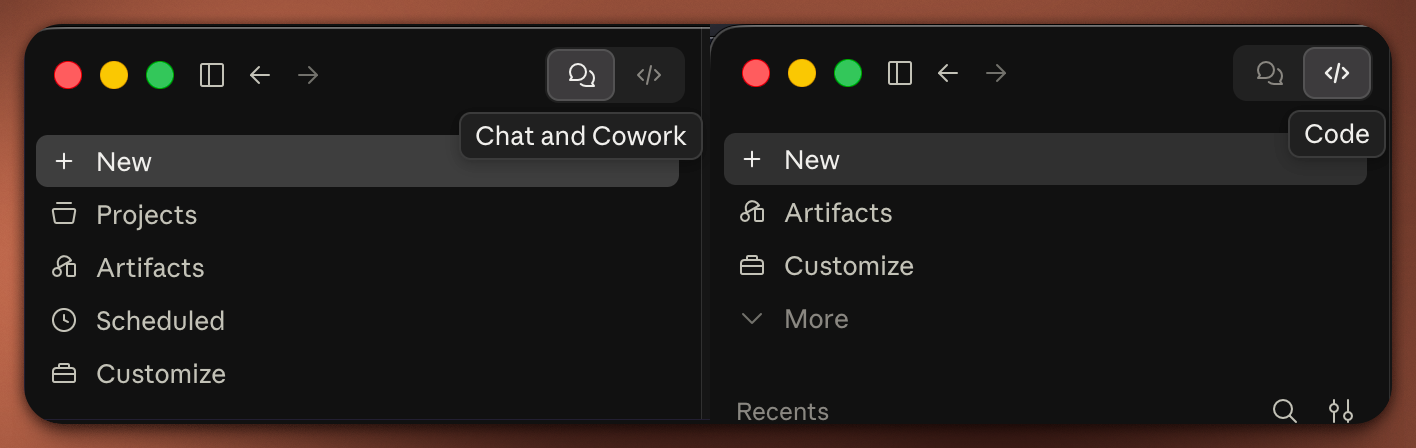
Claude Desktop の左上隅にあるモードセレクターを使ってモードを切り替えます：

<figure><img src="https://82113185-files.gitbook.io/~/files/v0/b/gitbook-x-prod.appspot.com/o/spaces%2Fsn71WYzecYYQw3KkF40b%2Fuploads%2Fgit-blob-88d0c92ad5382c3dc71ccacb0a5cd3cc040e4233%2Fclaude-desktop-mode-selector.png?alt=media" alt="Mode selector in Claude Desktop showing Chat, Cowork, and Code"><figcaption><p>Claude Desktop のモードセレクター</p></figcaption></figure>

***

### 手順 1: 設定を開く

開く **設定** Claude Desktop で：

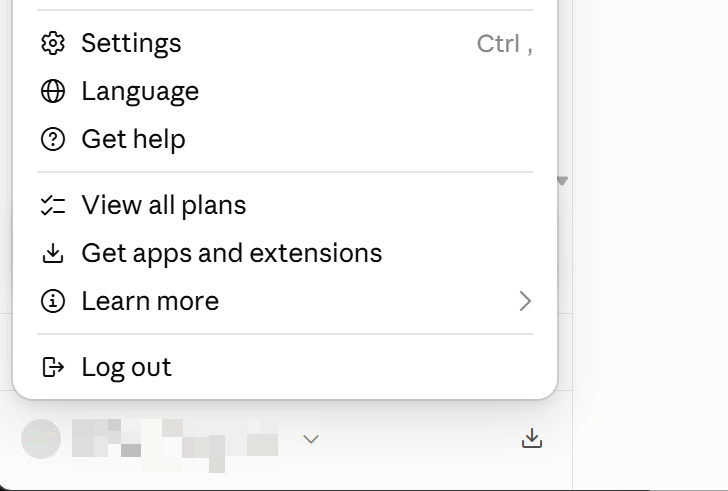
* 左下隅のプロフィール名をクリックして、次を選択します **設定**、または
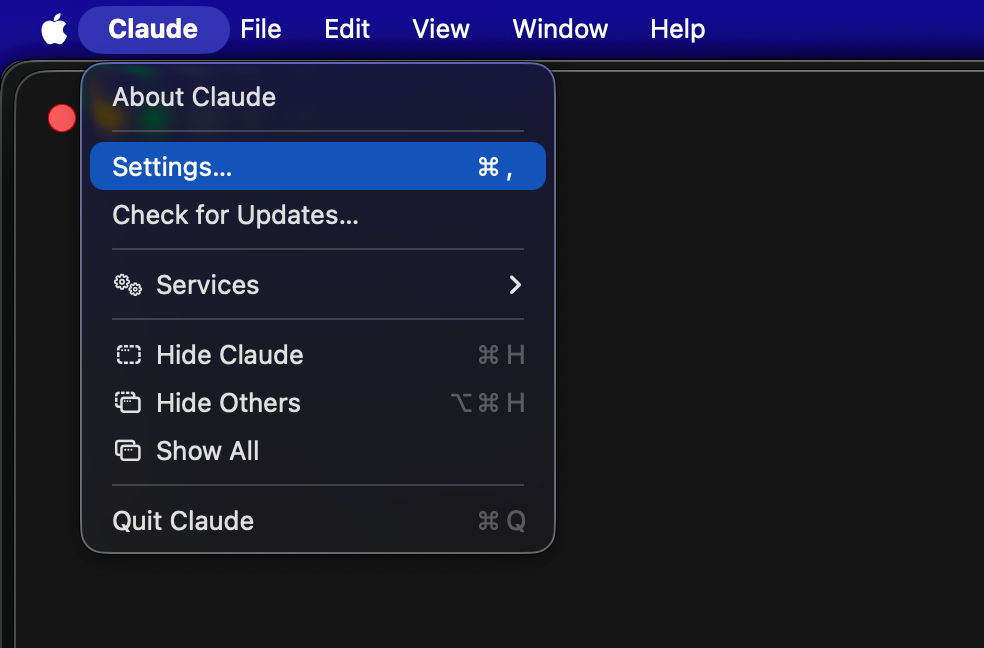
* アプリメニューを使用する場合： **Claude → 設定...** (`Cmd+,` を macOS で、または `Ctrl+,` （Windows では）。

{% tabs %}
{% tab title="プロフィールメニュー" %}

<figure><img src="https://82113185-files.gitbook.io/~/files/v0/b/gitbook-x-prod.appspot.com/o/spaces%2Fsn71WYzecYYQw3KkF40b%2Fuploads%2Fgit-blob-4d652fee91fc0c7e6fb11371bbd0546fc561bca8%2Fclaude-desktop-open-settings-profile.png?alt=media" alt="Open Settings from user profile menu"><figcaption><p>左下のプロフィールメニューから設定にアクセス</p></figcaption></figure>
{% endtab %}

{% tab title="アプリケーションメニュー（macOS）" %}

<figure><img src="https://82113185-files.gitbook.io/~/files/v0/b/gitbook-x-prod.appspot.com/o/spaces%2Fsn71WYzecYYQw3KkF40b%2Fuploads%2Fgit-blob-ab2f2f30e730e3205c7bf38b278f1808efaa734f%2Fclaude-desktop-open-settings-macos.png?alt=media" alt="Open Settings from macOS app menu"><figcaption><p>macOS のメニューバーから設定にアクセス</p></figcaption></figure>
{% endtab %}
{% endtabs %}

***

### 手順 2: 設定ファイルを開く

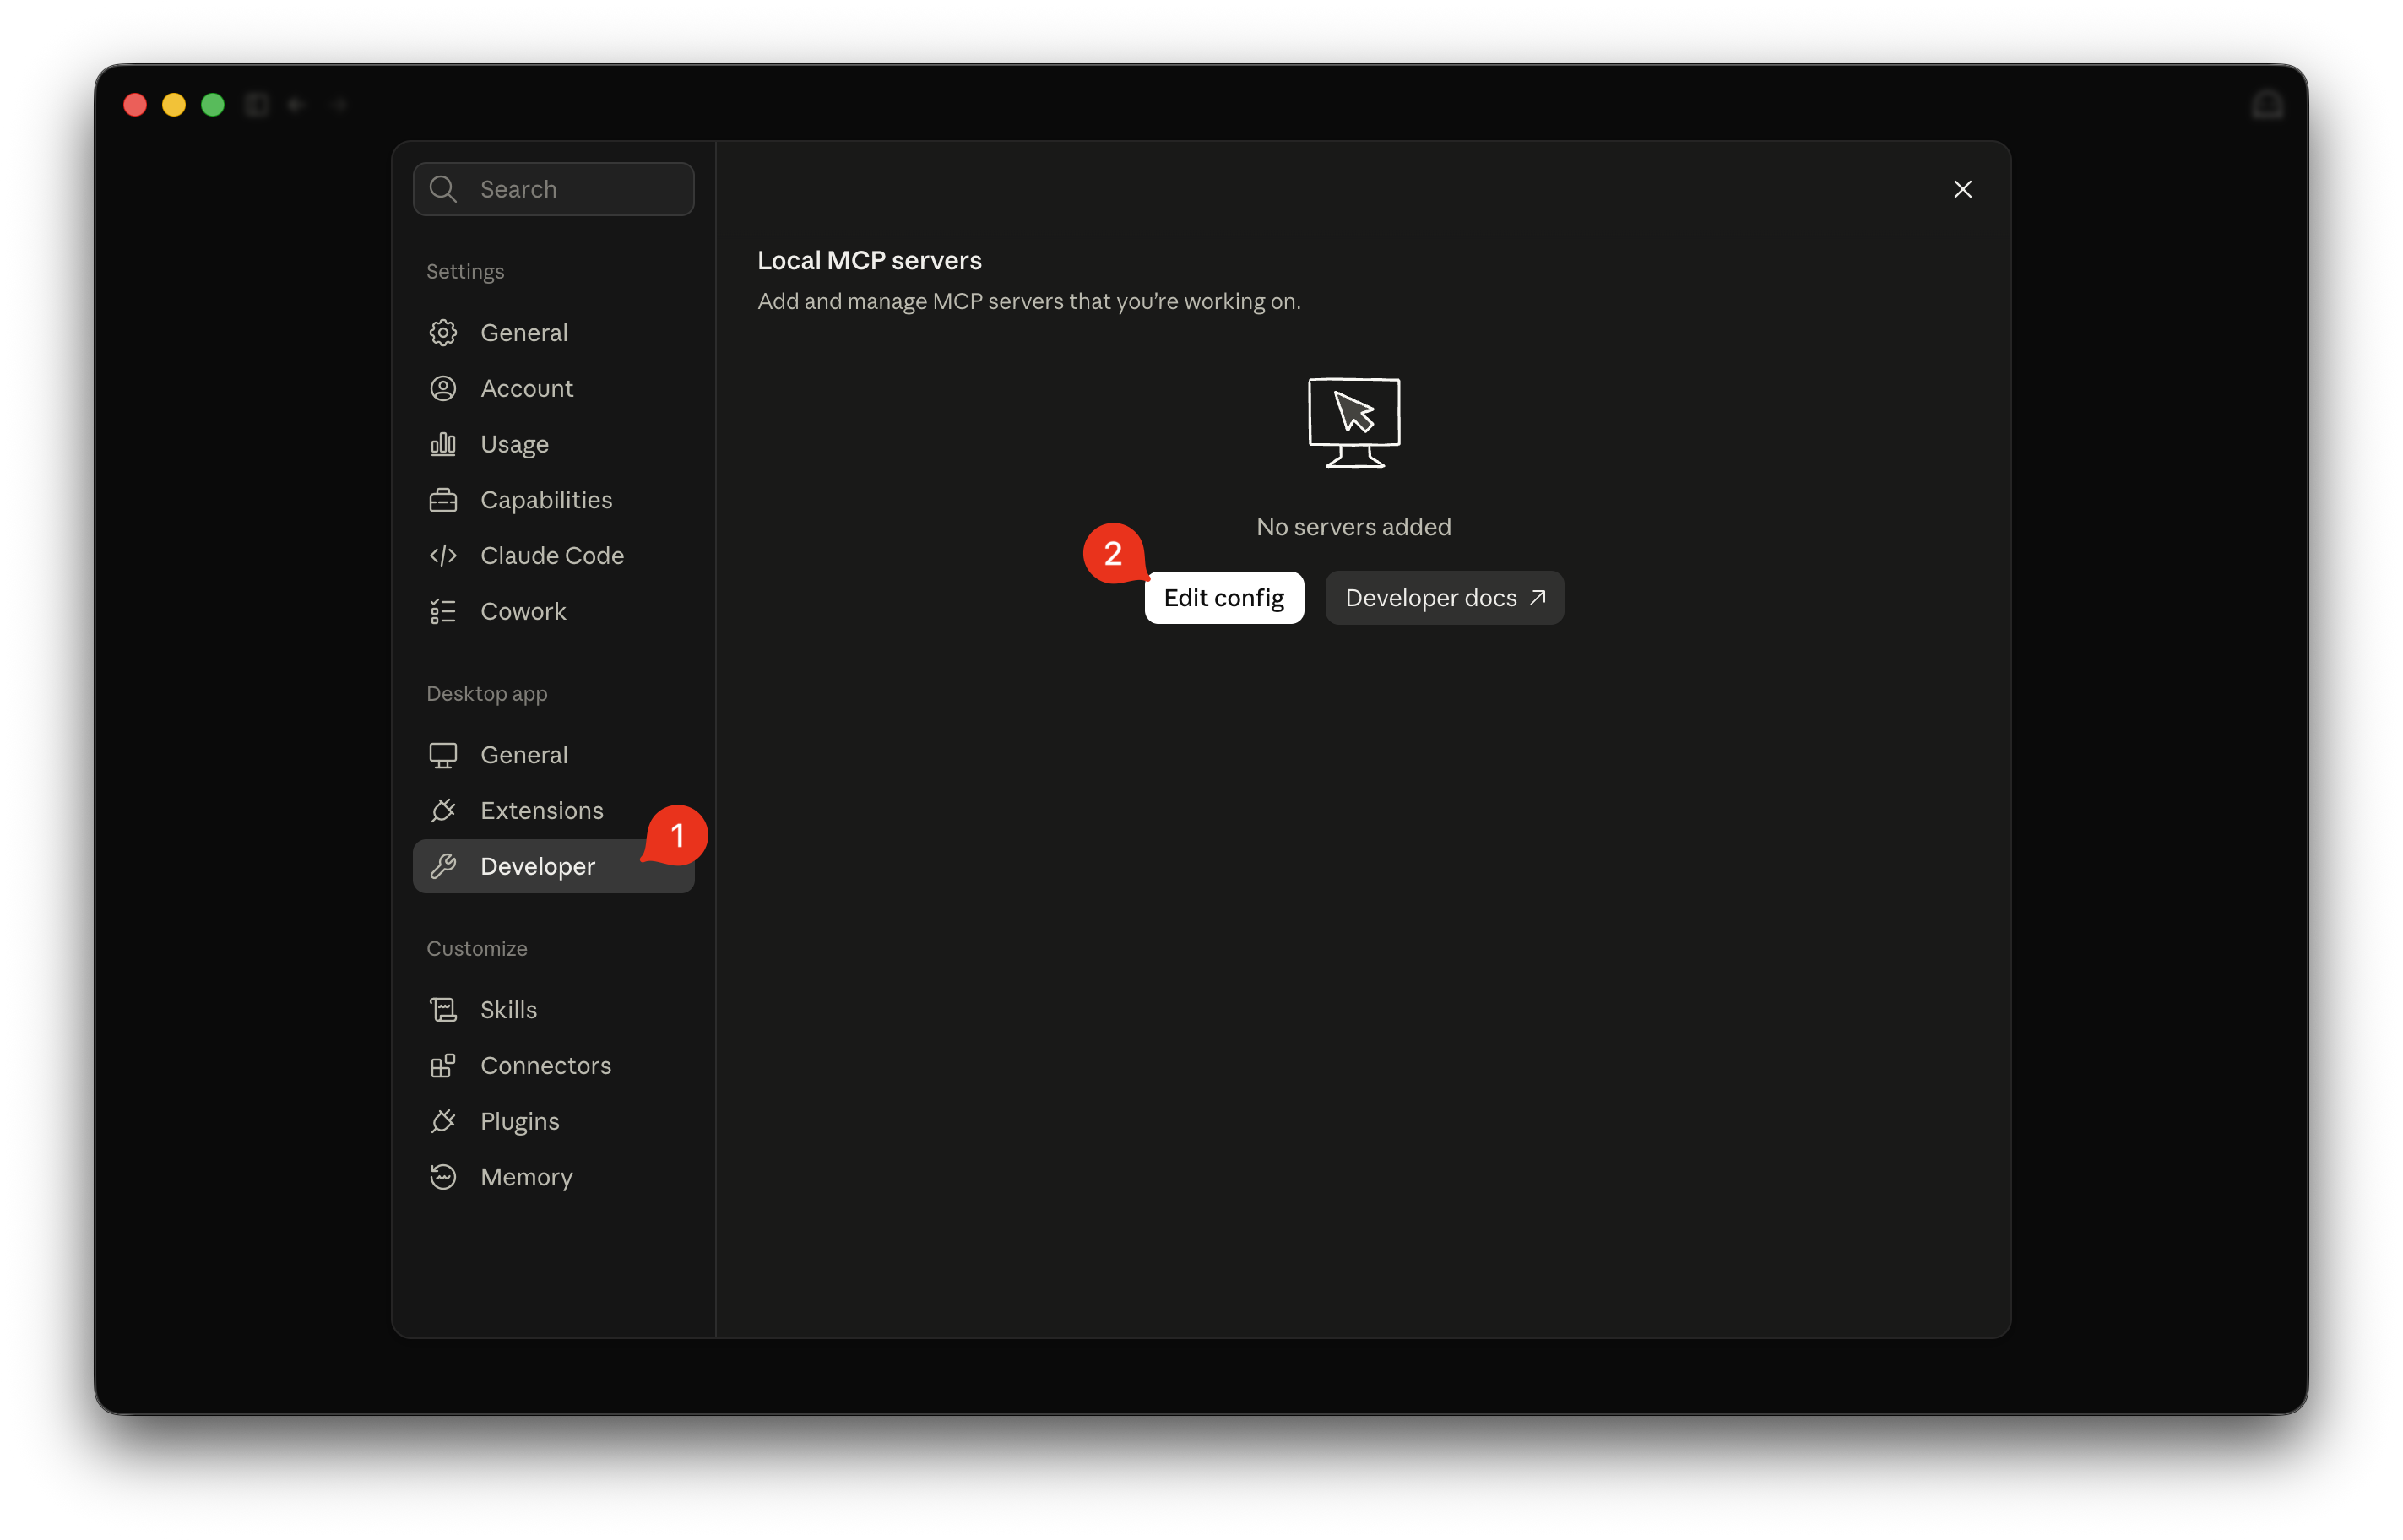
1. 設定ウィンドウで、次へ移動します **開発者** の下の **デスクトップアプリ** セクション。
2. 「 **設定を編集** ボタン。

<figure><img src="https://82113185-files.gitbook.io/~/files/v0/b/gitbook-x-prod.appspot.com/o/spaces%2Fsn71WYzecYYQw3KkF40b%2Fuploads%2Fgit-blob-429d628635458aa2260f57a684bfb2c4384fa6fb%2Fclaude-desktop-developer-edit-config.png?alt=media" alt="Developer settings tab with Edit Config button"><figcaption><p>開発者設定で「設定を編集」をクリック</p></figcaption></figure>

Claude Desktop は、システムのファイルマネージャー（Finder または File Explorer）を開き、 `claude_desktop_config.json` が選択された状態になります。

***

### 手順 3: ACE Studio の MCP サーバーを追加

1. 開く `claude_desktop_config.json` 任意のテキストエディターで。
2. ACE Studio で、次を開きます **設定 → 一般 → 外部エージェントアクセス** を開いて、次をクリックします **コマンドをコピー** の横にある **MCP サーバー（stdio）** して、正確な起動コマンドをコピーします。
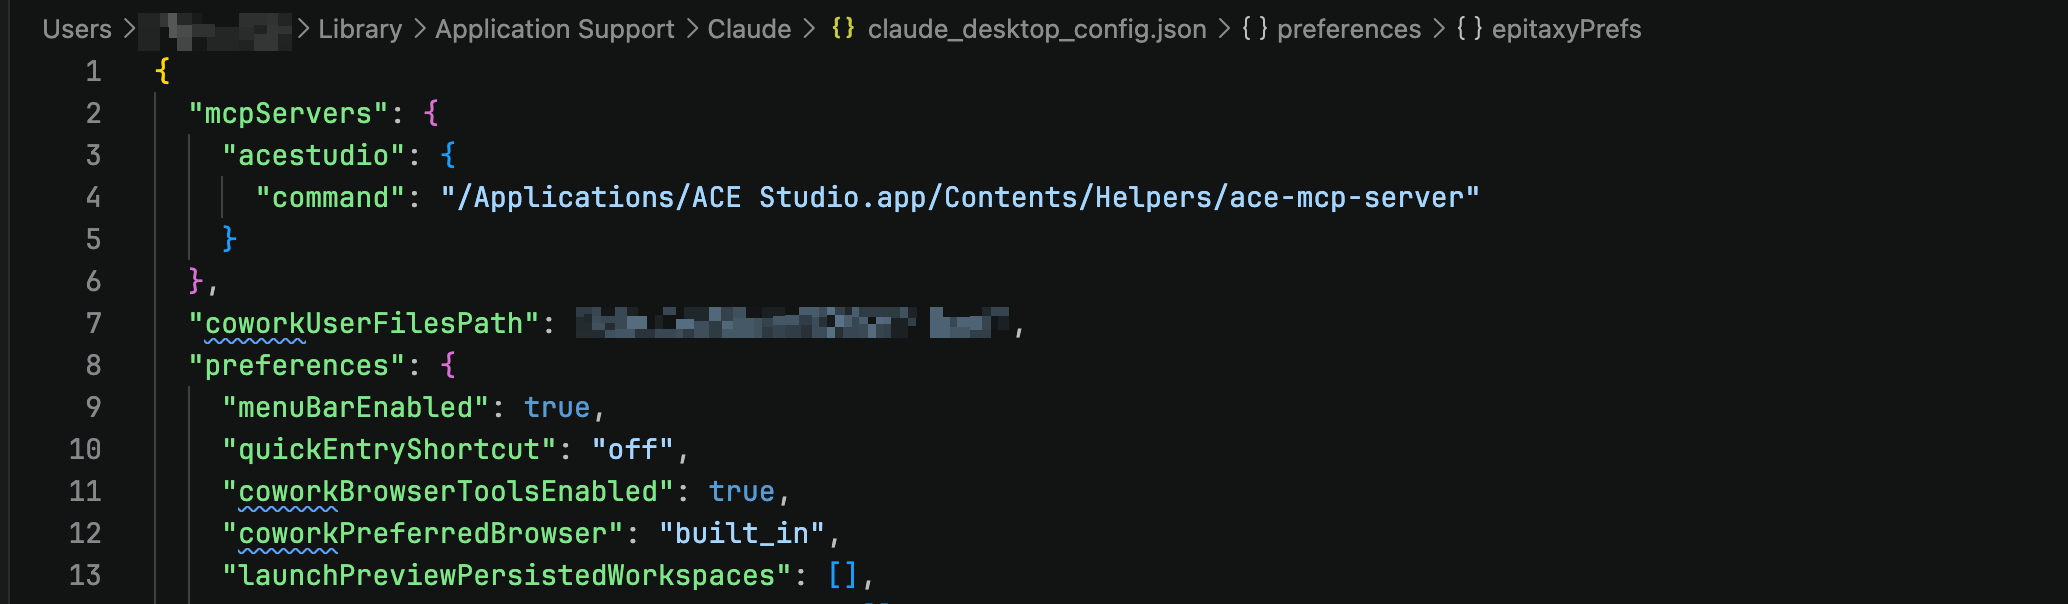
3. 次を追加します `acestudio` の設定を `mcpServers`:

```json
{
  "mcpServers": {
    "acestudio": {
      "command": "/Applications/ACE Studio.app/Contents/Helpers/ace-mcp-server"
    }
  }
}
```

<figure><img src="https://82113185-files.gitbook.io/~/files/v0/b/gitbook-x-prod.appspot.com/o/spaces%2Fsn71WYzecYYQw3KkF40b%2Fuploads%2Fgit-blob-d9c3fdd2ed7ede65689f1077697870598e262b7e%2Fclaude-desktop-config-json.png?alt=media" alt="claude_desktop_config.json configured with acestudio server"><figcaption><p><code>claude_desktop_config.json</code> acestudio サーバーを設定した状態で</p></figcaption></figure>

{% hint style="info" %}
**Windows のパスエスケープ：** JSON ファイルで Windows パスを手動記述する場合は、各バックスラッシュを二重バックスラッシュ（`\\`）、またはフォワードスラッシュ（`/`).
{% endhint %}

4. ファイルを保存してから、 **Claude Desktop を再起動** してください。

***

### 手順 4: 確認して使用を開始

#### 1. 接続状態を確認

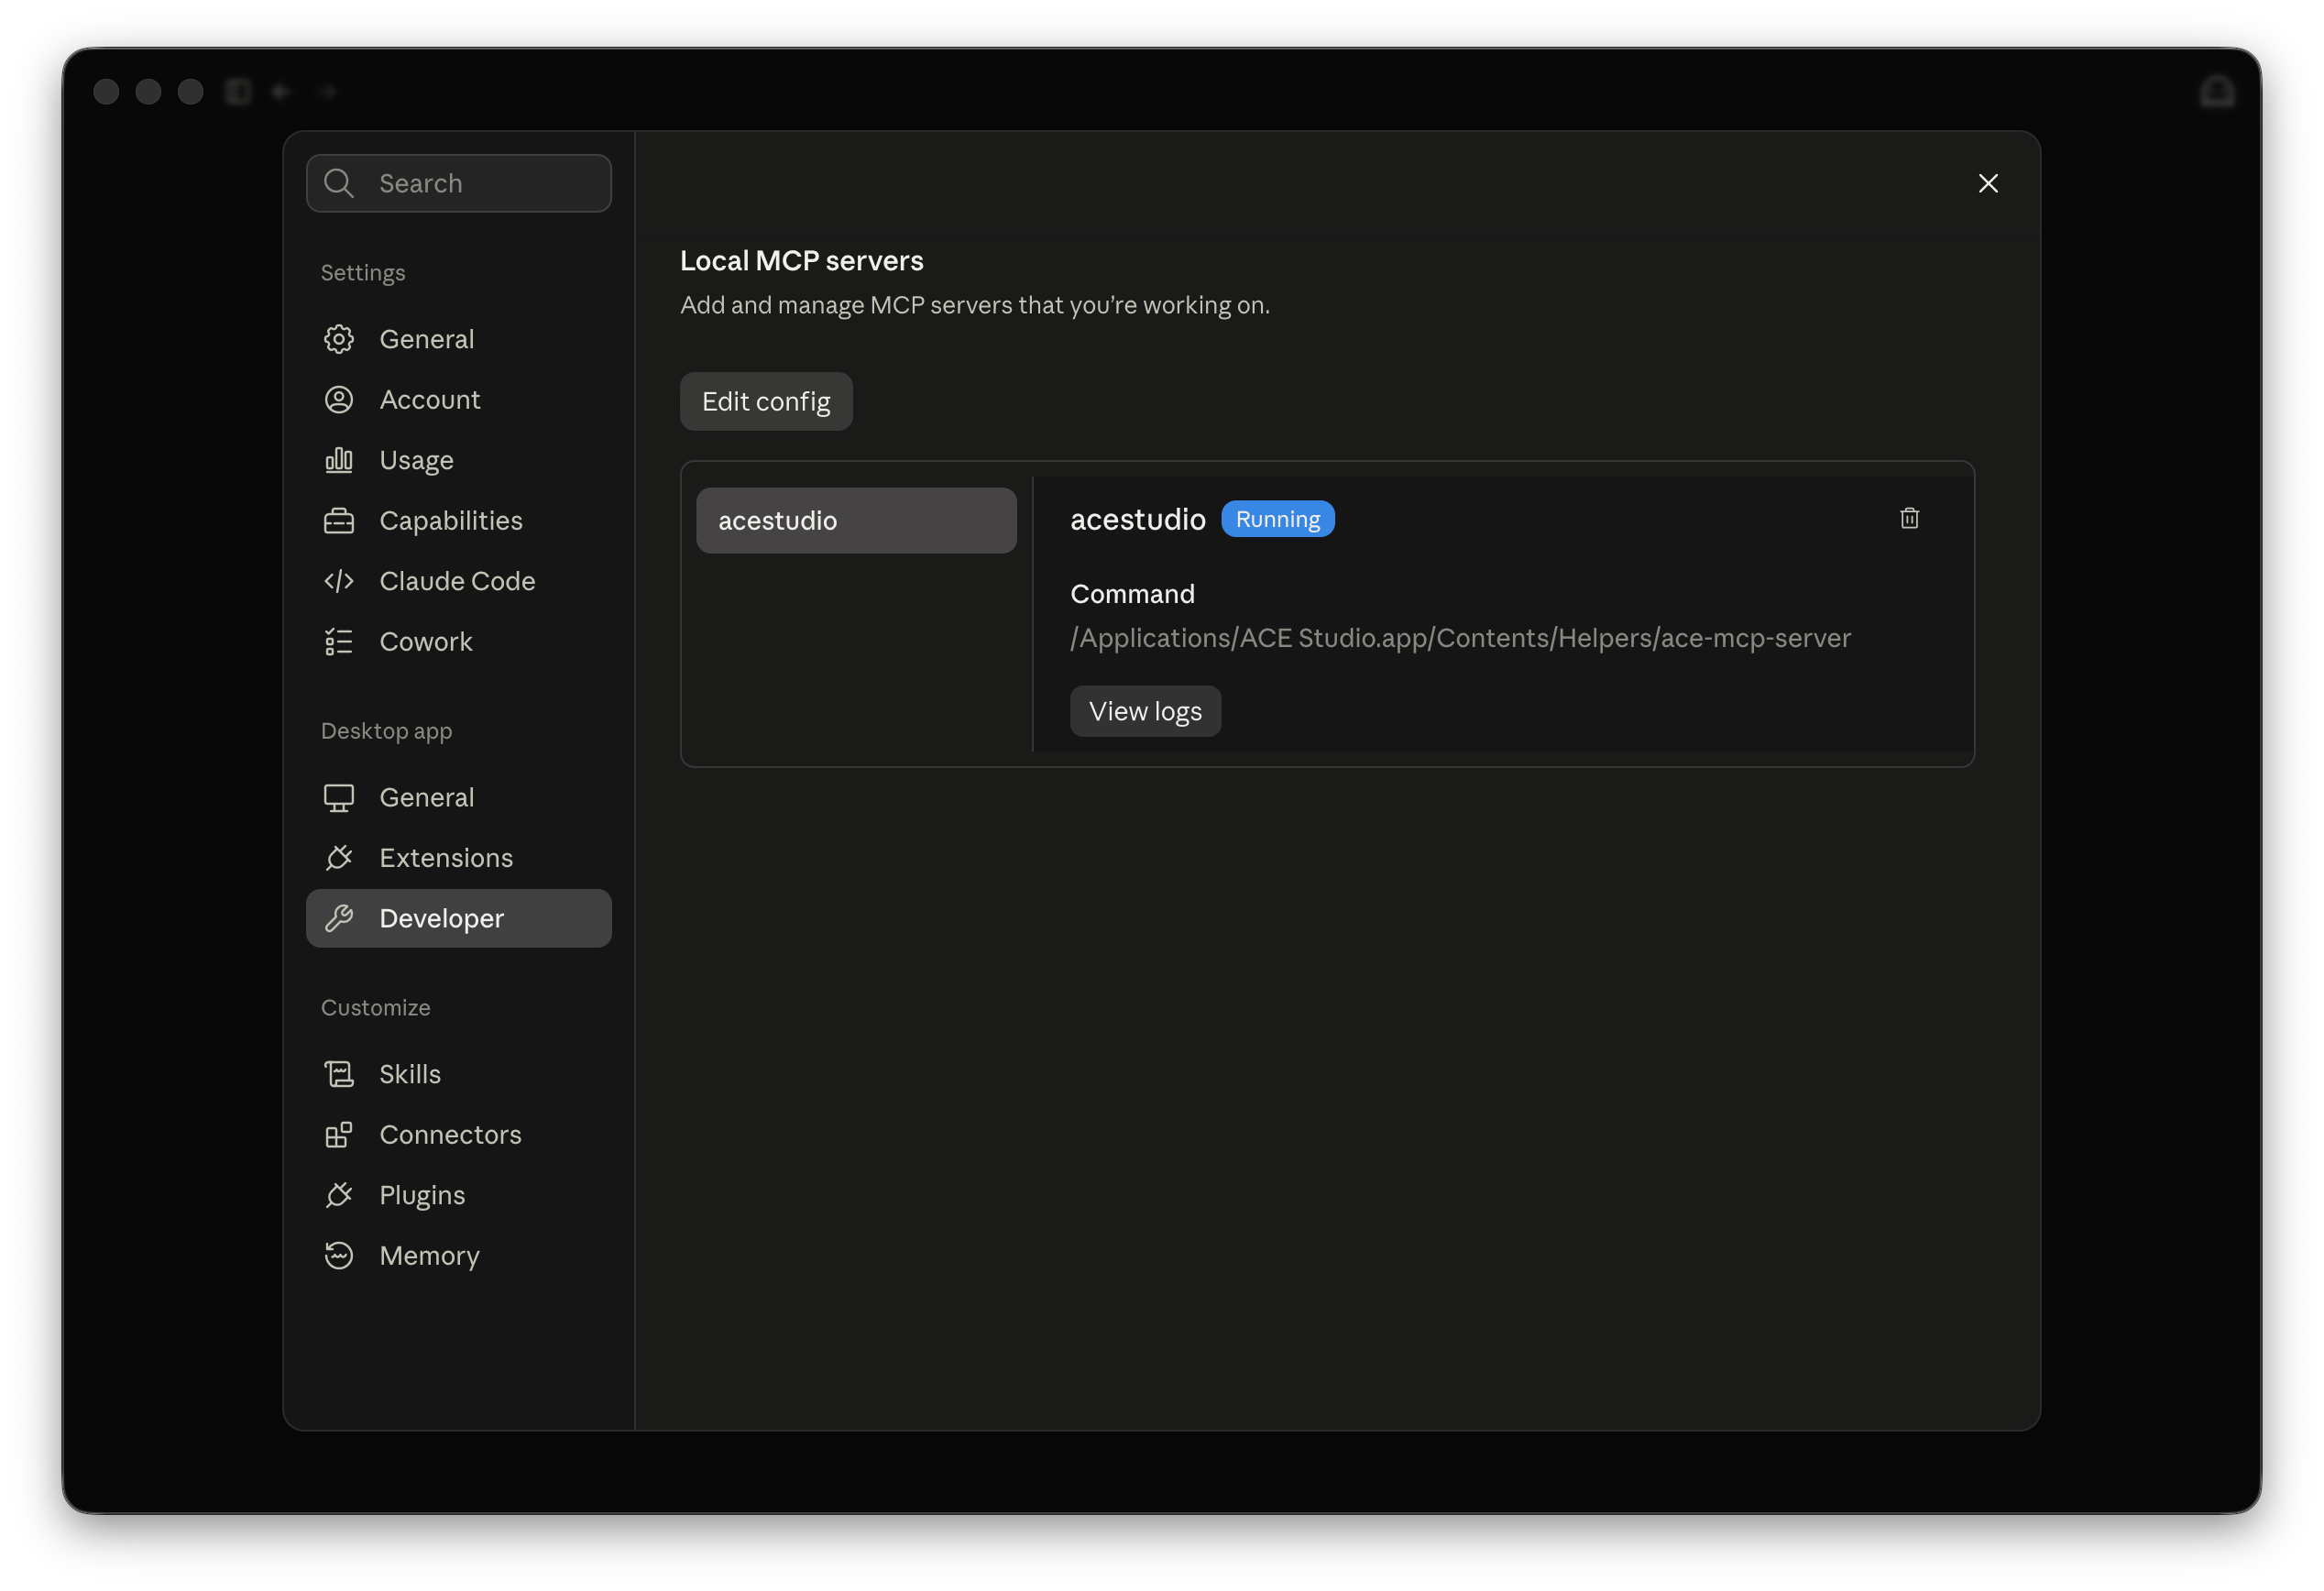
開く **設定 → 開発者** Claude Desktop で。次の内容が表示されるはずです **acestudio** の下に表示され **ローカル MCP サーバー** が実行中のステータスで。

<figure><img src="https://82113185-files.gitbook.io/~/files/v0/b/gitbook-x-prod.appspot.com/o/spaces%2Fsn71WYzecYYQw3KkF40b%2Fuploads%2Fgit-blob-4803e3f866334356d77d4bc233f88a64c5ac0c08%2Fclaude-desktop-mcp-connected.png?alt=media" alt="Local MCP Servers showing acestudio connected"><figcaption><p>アクティブな acestudio 接続を表示するローカル MCP サーバー</p></figcaption></figure>

#### 2. Chat または Cowork で有効化

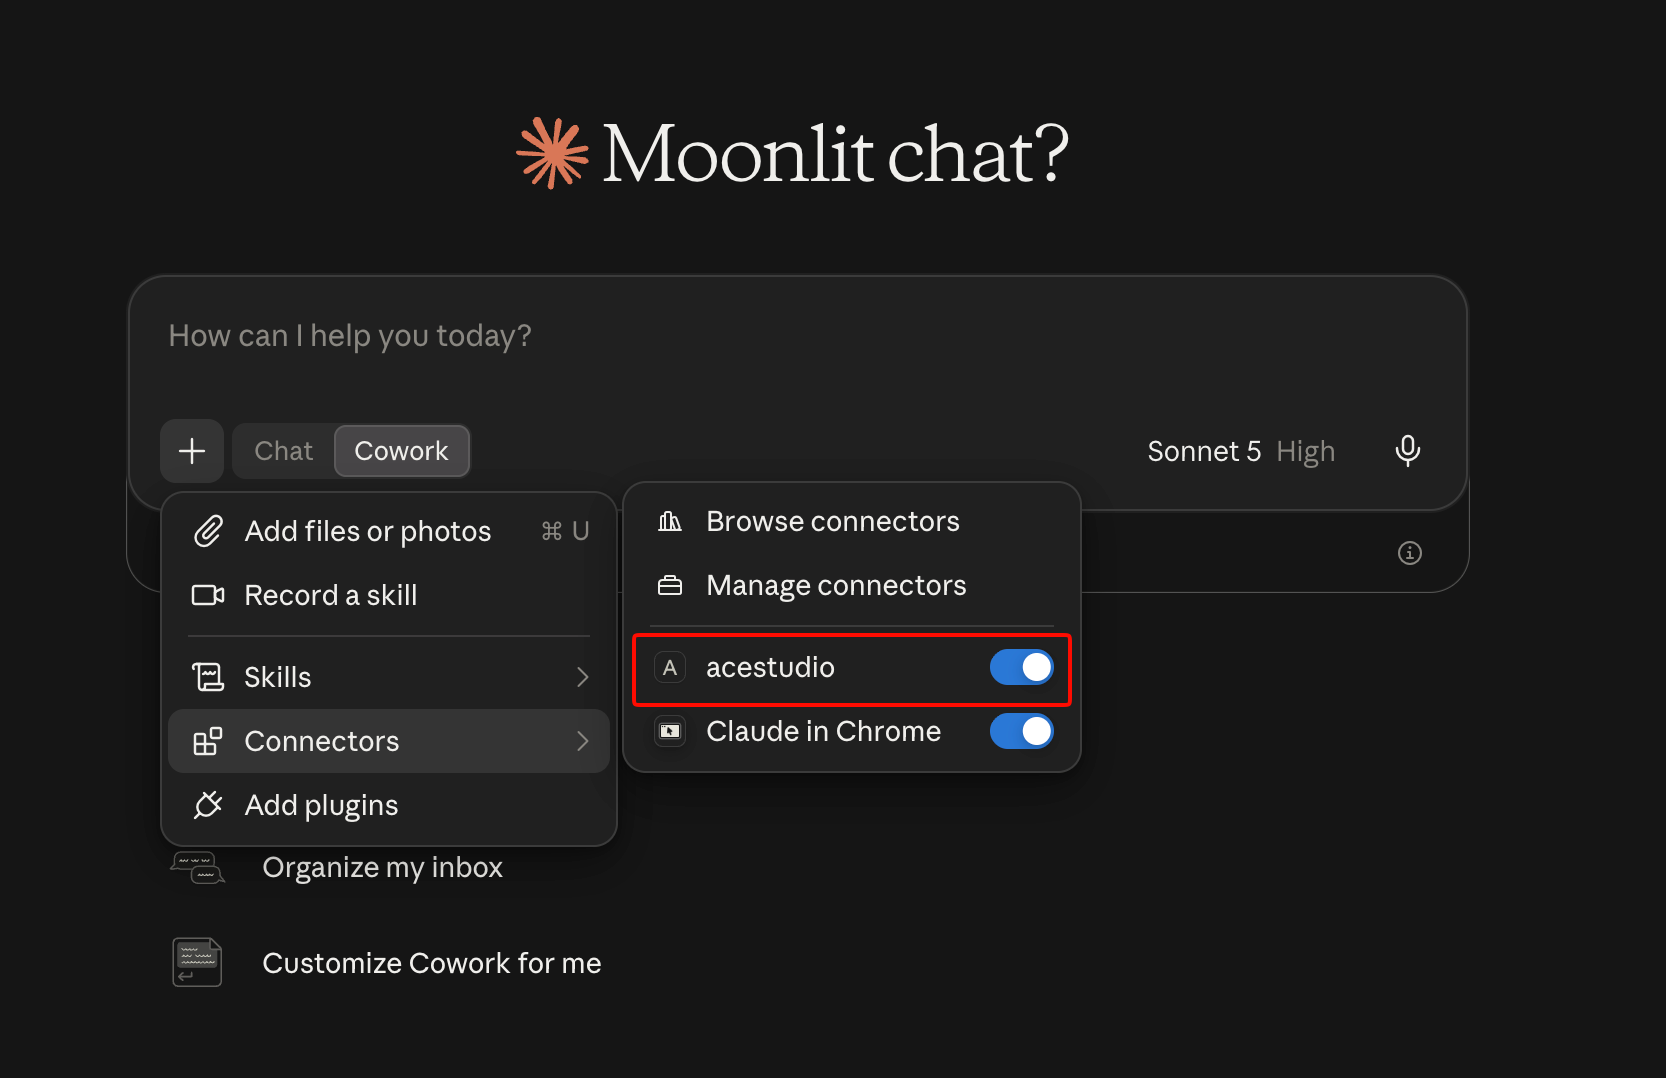
で会話を開始するとき **Chat** または **Cowork**、次のボタンをクリックします **+ / コネクター** メッセージ入力欄の下にあるボタンをクリックし、次が **acestudio** 切り替わっていることを確認します **ON**.

<figure><img src="https://82113185-files.gitbook.io/~/files/v0/b/gitbook-x-prod.appspot.com/o/spaces%2Fsn71WYzecYYQw3KkF40b%2Fuploads%2Fgit-blob-1ea14dac4375044032aa43a26769238ff8c8a6b3%2Fclaude-desktop-connector-active.png?alt=media" alt="Connectors menu showing acestudio connector enabled"><figcaption><p>acestudio コネクターが有効であることを確認してください</p></figcaption></figure>

#### 3. プロンプトでテスト

ACE Studio が開いて実行中であることを確認し、次のように Claude に尋ねます：

```
現在の ACE Studio プロジェクト情報を確認してください
```

Claude は ACE Studio に接続し、開いているプロジェクトを確認して、詳細（テンポ、調号、トラック、クリップ）を返します。


---

# Agent Instructions
This documentation is published with GitBook. GitBook is the documentation platform designed so that both humans and AI agents can read, navigate, and reason over technical content effectively. Learn more at gitbook.com.

## Querying This Documentation
If you need additional information that is not directly available in this page, you can query the documentation dynamically by asking a question.

Perform an HTTP GET request on the current page URL with the `ask` query parameter, and the optional `goal` query parameter:

```
GET https://docs.acestudio.ai/docs/product-wiki-ja/aijento/external-agent-access/claude-desktop-and-cowork.md?ask=<question>&goal=<endgoal>
```

`ask` is the immediate question: it should be specific, self-contained, and written in natural language.
`goal` is optional and describes the broader end goal you are ultimately trying to accomplish on behalf of the user. GitBook uses it to tailor the answer towards what is most useful for that goal.

The response will contain a direct answer to the question and relevant excerpts and sources from the documentation.

Use this mechanism when the answer is not explicitly present in the current page, you need clarification or additional context, or you want to retrieve related documentation sections.