> For the complete documentation index, see [llms.txt](https://docs.acestudio.ai/llms.txt). Markdown versions of documentation pages are available by appending `.md` to page URLs; this page is available as [Markdown](https://docs.acestudio.ai/ai-tools/music-video/creating-a-music-video.md).

# Creating a Music Video

This page walks you through a full **Highly Customized** production, from your song to the finished video. You give creative input at a few key milestones; the [Director](/ai-tools/music-video.md#your-director) handles everything else.

Looking for a short social-media clip instead of a full video? See [Creating a Promo Clip](/ai-tools/music-video/creating-a-promo-clip.md).

## How to Create a Music Video

### 1. Start Your Session

Music Video starts from your current ACE Studio project. That can be a song you produced in ACE Studio, or a finished track you imported into an empty project — either way works.

Click <kbd>Music Video</kbd> in the top-right corner. With your music in place on the [Canvas](/project/arrangement-in-canvas/canvas.md), click <kbd>Start Session</kbd>. The Director renders your whole project and uses the result as the song for your video.

<figure><img src="/files/EoQ2XhU76MdK9mGXJA1Q" alt=""><figcaption><p>Music Video lives in the top-right corner</p></figcaption></figure>

<figure><img src="/files/lOLIPY0A645JWYem0g70" alt=""><figcaption><p>Put your music on the Canvas, then start the session</p></figcaption></figure>

{% hint style="warning" %}
If you change the music after the session has started, tell the Director — it won't pick up project changes on its own. The Director will listen to your project again, rerun the analysis, and continue from the new version.
{% endhint %}

### 2. Choose "Highly Customized"

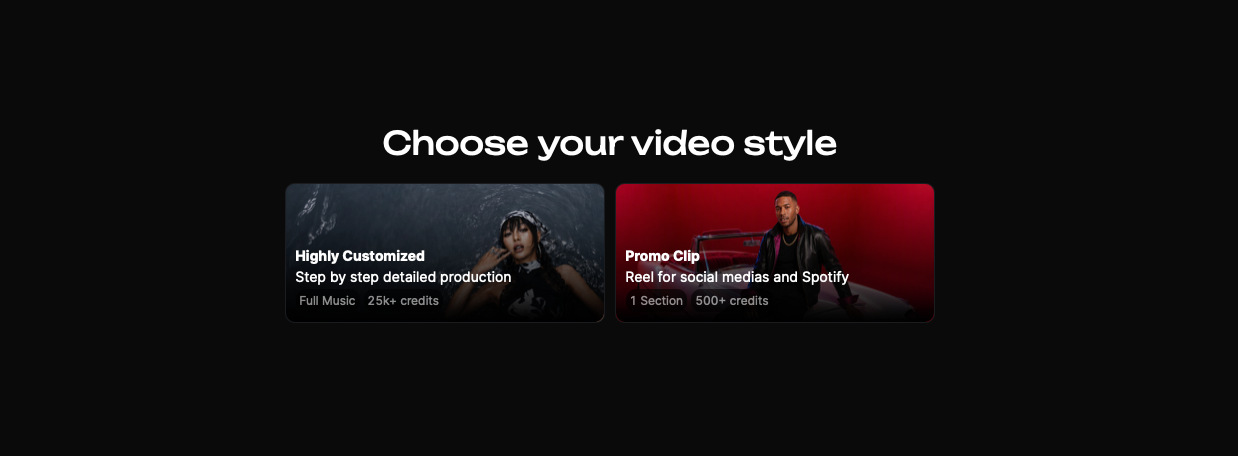
Next, choose your video style. There are two options:

* **Highly Customized** — a full-length music video for the whole song, with step-by-step detailed production (25k+ credits). This page covers this flow.
* **Promo Clip** — a short clip from one section of your song, for social media (500+ credits). See [Creating a Promo Clip](/ai-tools/music-video/creating-a-promo-clip.md).

Select **Highly Customized**.

<figure><img src="/files/erUDYwSWqKVj3bcyyp9T" alt=""><figcaption><p>Choose your video style</p></figcaption></figure>

### 3. Choose Your Aspect Ratio

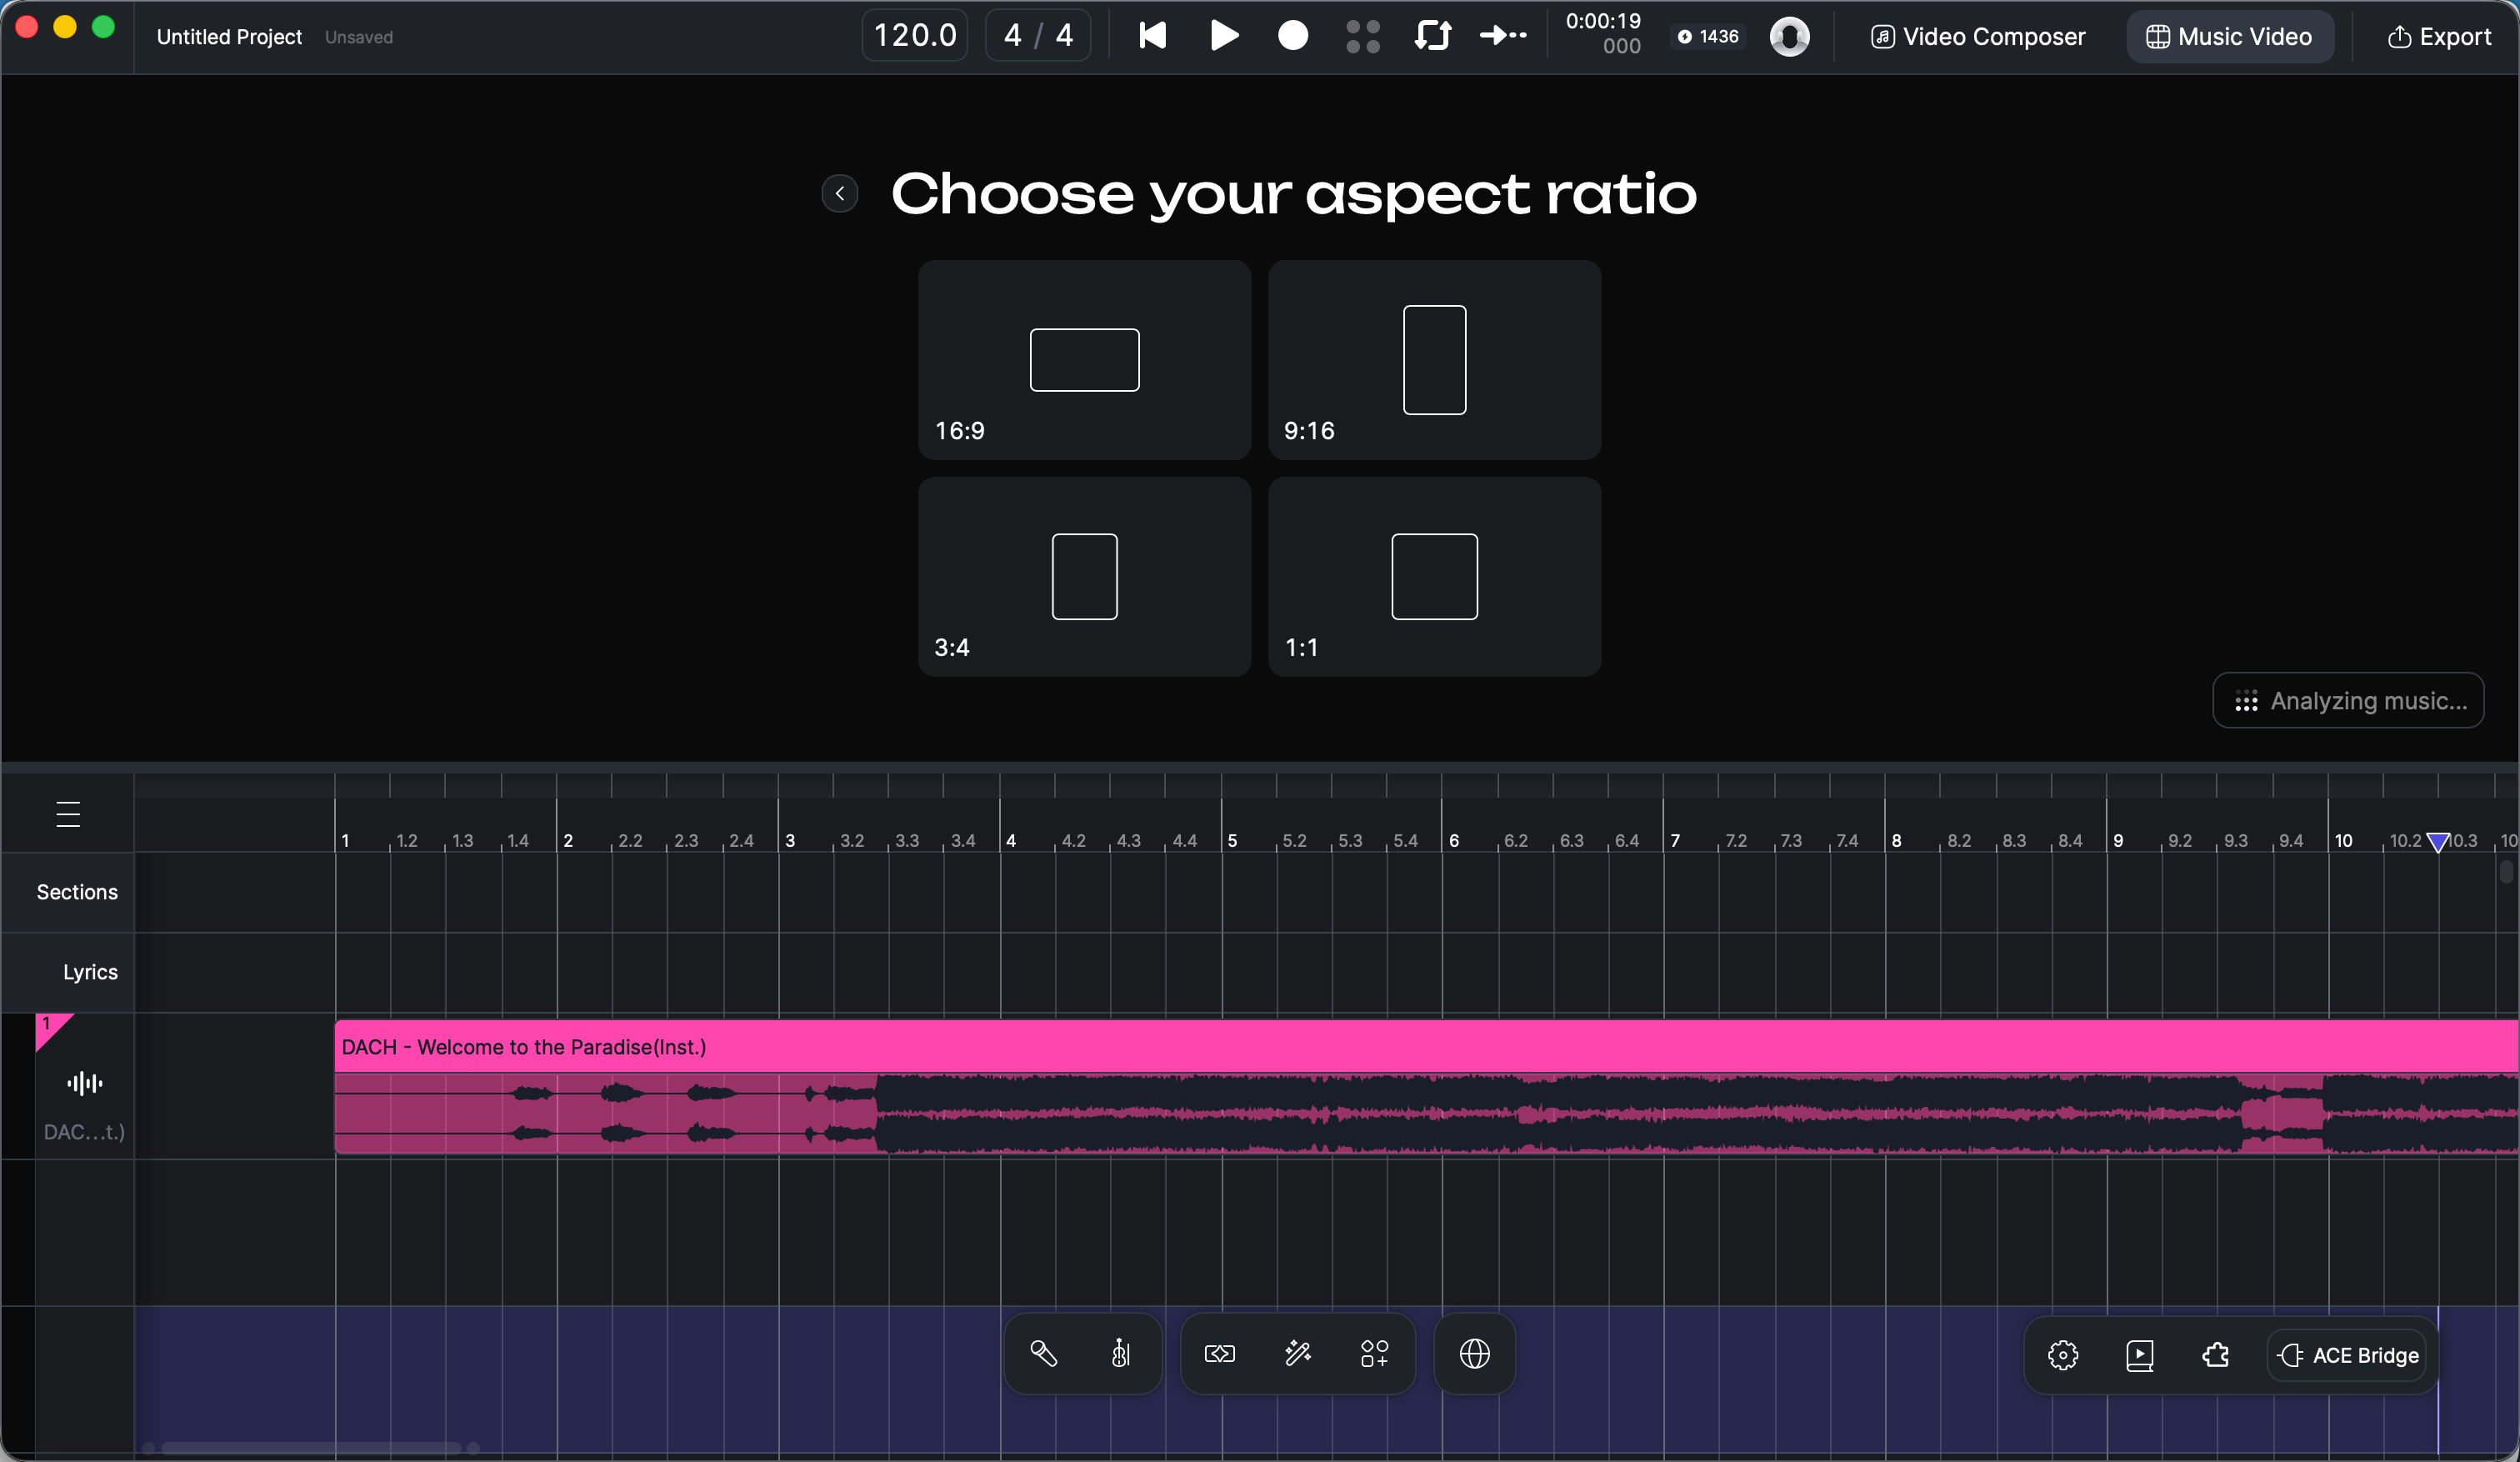
Pick the format that fits where the video will live: **16:9**, **9:16**, **3:4**, or **1:1**.

While you make your choices, your song is analyzed automatically in the background: tempo, key, mood, instrumentation, and song sections (verse, chorus, bridge). If it has lyrics, they are transcribed and time-aligned as well.

<figure><img src="/files/Z91BewNMcnUvnvX9EqwX" alt=""><figcaption><p>Choose your aspect ratio</p></figcaption></figure>

<figure><img src="/files/4IlfLhcG36iH3fIVWxRc" alt=""><figcaption><p>The song is analyzed automatically</p></figcaption></figure>

### 4. Describe Your Idea

Now tell the Director what you have in mind. Two things happen on this screen:

* **Describe your idea** (required) — the style, the mood, a storyline, a reference to an artist's look. Anything goes, but a clear style reference makes a big difference in quality.
* **Upload a character** (optional but recommended) — click <kbd>+ Character</kbd> to upload a reference image: your original character, a photo, your pet — any visual you want as the main subject of the video. The character sheets will be built on your reference instead of generated from scratch.

{% hint style="info" %}
Have more reference images — a visual style, a location? You can also add them to the Library at any time and tell the Director they're there. See [Adding Your Own Assets](/ai-tools/music-video/editing-and-iteration.md#how-to-add-your-own-assets-to-the-library).
{% endhint %}

### 5. Answer the Onboarding Questions

The Director asks you three questions, presented as option cards:

* **Visual style** — for example cinematic realism, dreamy film grain, or cyberpunk
* **Storytelling approach** — pure performance, light narrative, or story-driven
* **Lead character** — who your protagonist is and what they feel like

You can also add anything else in free form — a mood, a location, a reference to an artist's style.

<figure><img src="/files/2P3DNUBmU0ldX2eUgSPG" alt=""><figcaption><p>Onboarding: a few decisions, one conversation</p></figcaption></figure>

{% hint style="warning" %}
Right after onboarding is the best moment to check the song sections and lyric timing on the Canvas. Everything downstream — shot timing, beat-aligned cuts, lip sync — is built on them. See [Fixing Song Sections & Lyric Timing](/ai-tools/music-video/editing-and-iteration.md#how-to-fix-song-sections-and-lyric-timing).
{% endhint %}

### 6. Choose the Base Look

The Director generates several candidate character sheets — multi-view images showing your character from the front, side, and back. Pick the one you like best. That candidate becomes the **base look**, and every later look is built on it so your character stays consistent across the whole video.

<figure><img src="/files/UqrPrsbxABQvjqxWn2ze" alt=""><figcaption><p>Pick one candidate as the base look</p></figcaption></figure>

### 7. Review Style & Scene References

The Director produces a style guide — the rules for color, light, and texture that keep the whole video coherent — plus an environment reference image for each scene. Scene references are always empty: no people, just the space and the light, so characters composite cleanly later.

<figure><img src="/files/3CSlgsbSW35GimvCyHCH" alt=""><figcaption><p>Scene references are empty environments</p></figcaption></figure>

### 8. Review the Creative Plan

With the look of your character and scenes settled, the Director writes a project-level creative plan: the video's structure section by section, the visual tone, 2–3 recurring scene anchors, and the editing style. Read it, ask for changes if anything feels off, and confirm to move on.

The plan — like every document the Director writes — is directly editable if you'd rather change something yourself. See [Editing the Director's Documents](/ai-tools/music-video/editing-and-iteration.md#how-to-edit-the-directors-documents).

<figure><img src="/files/8zUx5GujcaQACpARIe8r" alt=""><figcaption><p>The creative plan</p></figcaption></figure>

### 9. Shot Scripts

The Director writes a script for every shot: its exact time window in the song, what happens in it, the mood, and how it cuts to its neighbors. This is the creative core of the production, and it is fully handled for you.

{% hint style="info" %}
Your [video model choice](/ai-tools/music-video.md#choosing-a-video-model) affects the script — different models allow different maximum shot lengths. If you have a preference, say so early: switch models in the selector below the chat input, or just tell the Director.
{% endhint %}

### 10. Per-Scene Looks

The Director dresses your character for each scene — new outfit and styling to match the setting, same face and hair as the base look.

### 11. Choreography (Optional)

If your video involves dancing or physical performance, the Director designs the moves shot by shot and generates motion keyframe grids for the technical ones — spins, jumps — so the generated motion stays accurate. You can also ask for backup dancers; they get their own looks first, and the choreography is designed around them.

A purely lyrical video with no dancing skips this step.

### 12. Preview the Animatic

The Director draws a storyboard for every shot and lays them all out on the Canvas in their time slots. The result is an **animatic**: a preview version of the entire video you can play before a single frame is rendered.

This is your best checkpoint. Play it through, drag or trim storyboards directly on the Canvas to adjust pacing, and tell the Director about any shot you want reworked.

### 13. Generate the Video

Once every shot has everything it needs, the Director lets you know the video is ready to generate. Confirm, and rendering starts for the whole video at once.

Shots render in parallel, so feel free to step away and check back in. Shots with on-camera singing automatically get an extra lip-sync refinement pass; instrumental videos skip it.

<figure><img src="/files/qt29ejoKmtMhaHt4g3Zg" alt=""><figcaption><p>Every storyboard in place on the Canvas, ready to generate</p></figcaption></figure>

### 14. Watch & Export

As each shot finishes, it automatically replaces its storyboard placeholder on the Canvas. When the last one lands, your music video is done — press play and watch it right there. When you are happy with the cut, export it like any other project — see [Export Files](/project/file-management/export-files.md).

The finished cut is a starting point, not a locked file. Spot a glitch, a stiff transition, or a shot you'd frame differently? See [Editing & Iteration](/ai-tools/music-video/editing-and-iteration.md).


---

# Agent Instructions
This documentation is published with GitBook. GitBook is the documentation platform designed so that both humans and AI agents can read, navigate, and reason over technical content effectively. Learn more at gitbook.com.

## Querying This Documentation
If you need additional information that is not directly available in this page, you can query the documentation dynamically by asking a question.

Perform an HTTP GET request on the current page URL with the `ask` query parameter, and the optional `goal` query parameter:

```
GET https://docs.acestudio.ai/ai-tools/music-video/creating-a-music-video.md?ask=<question>&goal=<endgoal>
```

`ask` is the immediate question: it should be specific, self-contained, and written in natural language.
`goal` is optional and describes the broader end goal you are ultimately trying to accomplish on behalf of the user. GitBook uses it to tailor the answer towards what is most useful for that goal.

The response will contain a direct answer to the question and relevant excerpts and sources from the documentation.

Use this mechanism when the answer is not explicitly present in the current page, you need clarification or additional context, or you want to retrieve related documentation sections.