> For the complete documentation index, see [llms.txt](https://docs.acestudio.ai/llms.txt). Markdown versions of documentation pages are available by appending `.md` to page URLs; this page is available as [Markdown](https://docs.acestudio.ai/ai-agent/external-agent-access/chatgpt-for-desktop.md).

# ChatGPT for desktop

Connect ChatGPT for desktop (ChatGPT Work & Codex) to ACE Studio via MCP.

Connect ChatGPT for desktop to ACE Studio through a local MCP (Model Context Protocol) server to inspect, arrange, and edit your music projects directly from your AI workspace.

{% hint style="warning" %}
**App & Mode Compatibility:**

* **ChatGPT Classic is not supported:** The legacy desktop app does not support local STDIO MCP servers. Please update to the modern [ChatGPT desktop app](https://help.openai.com/en/articles/20001276-moving-to-the-new-chatgpt-desktop-app).
* **Standard Chat mode does not support local MCP:** In the desktop app, standard **Chat** mode only connects to remote HTTP-based plugins and remote MCP servers configured via ChatGPT Web / Developer Mode. It cannot communicate with local desktop applications.
* **Use Codex or ChatGPT Work:** Both **Codex** mode and **ChatGPT Work** run on your local machine and fully support local STDIO MCP servers.
  {% endhint %}

***

### Recommended: Automated Setup via Codex

Because the modern ChatGPT desktop app shares its underlying environment and MCP configuration between **Codex** and **ChatGPT Work**, you do not need to manually navigate settings menus. You can let Codex configure everything for you automatically:

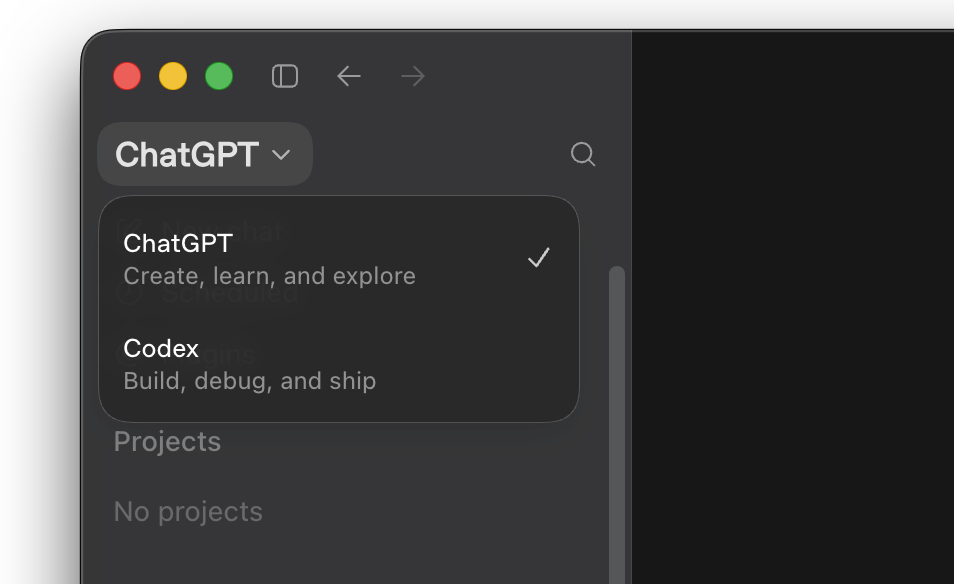
1. In the ChatGPT desktop app, open the mode selector in the top-left corner and switch to **Codex**.
2. Copy the **Automated Setup Prompt** from [External Agent Access](/ai-agent/external-agent-access.md#path-a-let-your-ai-agent-configure-it-for-you) and send it to Codex.
3. Codex will automatically detect your ACE Studio installation, configure the MCP server in `~/.codex/config.toml`, and make the tools available across both Codex and ChatGPT Work.

<figure><img src="https://3596338706-files.gitbook.io/~/files/v0/b/gitbook-x-prod.appspot.com/o/spaces%2Fsn71WYzecYYQw3KkF40b%2Fuploads%2Fgit-blob-bd6c9b89980a8bc1e9538fce71dee76ac0d9f710%2Fchatgpt-desktop-mode-switcher.png?alt=media" alt="Mode selector in ChatGPT for desktop showing Codex"><figcaption><p>Switch to Codex in the top-left mode selector to run automated setup</p></figcaption></figure>

***

### Using ChatGPT Work

Once configured, you can either continue chatting in **Codex** mode or switch to **ChatGPT Work** for general conversational workflows:

1. Switch to the main chat view in the ChatGPT app.
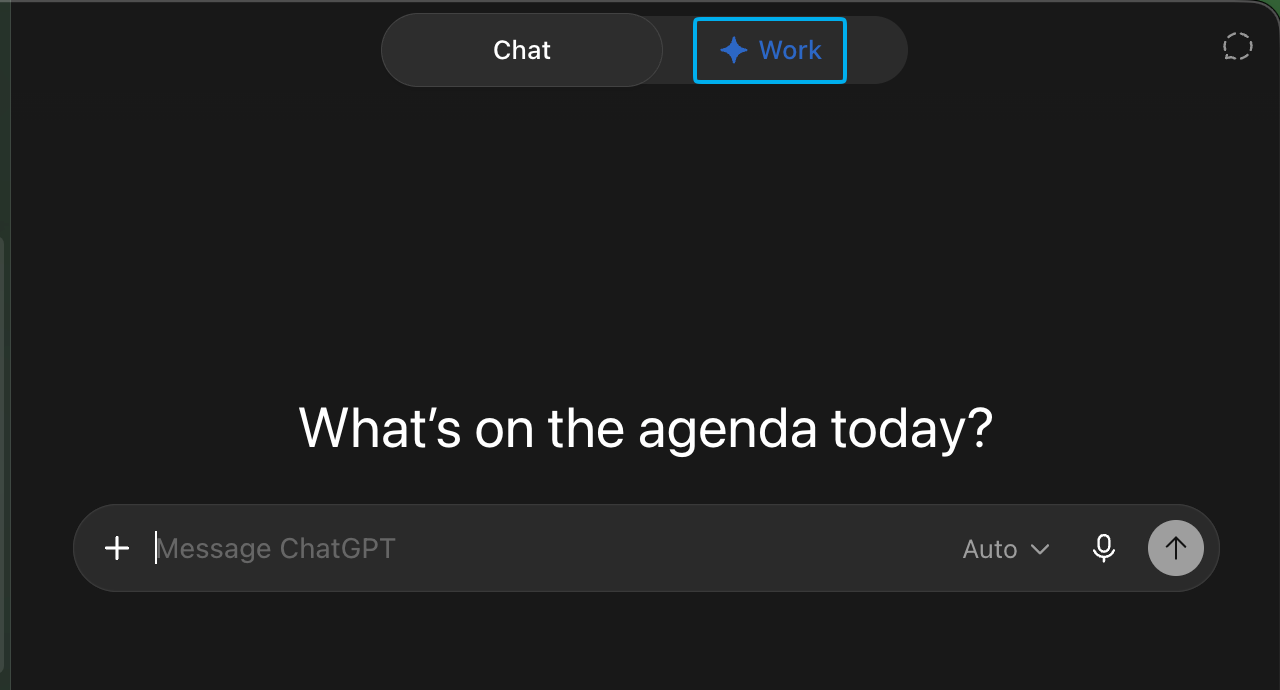
2. In the composer at the bottom of the window, click the **Work** toggle button to enable local tools and computer access.
3. You will see **ACE Studio** active and ready to assist with your music project.

<figure><img src="https://3596338706-files.gitbook.io/~/files/v0/b/gitbook-x-prod.appspot.com/o/spaces%2Fsn71WYzecYYQw3KkF40b%2Fuploads%2Fgit-blob-344f4119c65e227b3f266921317c10f6851707c0%2Fchatgpt-desktop-work-mode-toggle.png?alt=media" alt="Toggle Work mode in ChatGPT prompt bar"><figcaption><p>Click "Work" in the composer prompt bar to enable local tools</p></figcaption></figure>

***

### Alternative: Manual Setup via Settings

If you prefer to configure the server manually through the graphical interface, follow these steps:

#### Step 1: Open Settings

Open **Settings** in ChatGPT:

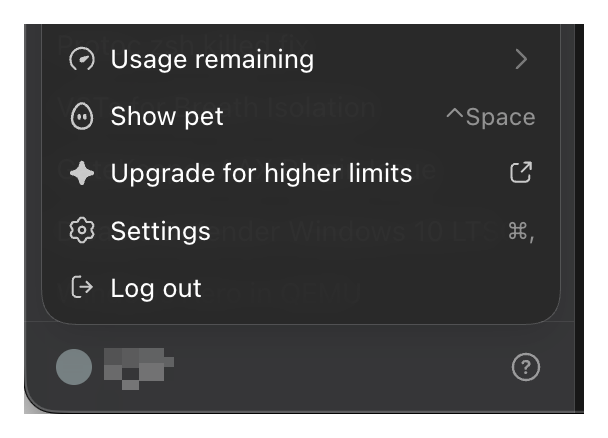
* Click your profile avatar in the bottom-left corner and select **Settings**, or
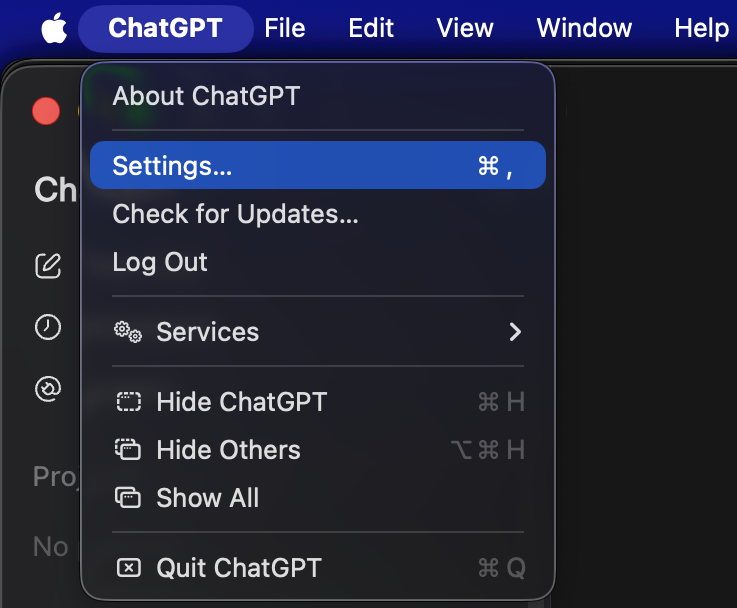
* Use the app menu: **ChatGPT → Settings...** (`Cmd+,` on macOS or `Ctrl+,` on Windows).

{% tabs %}
{% tab title="Profile Menu" %}

<figure><img src="https://3596338706-files.gitbook.io/~/files/v0/b/gitbook-x-prod.appspot.com/o/spaces%2Fsn71WYzecYYQw3KkF40b%2Fuploads%2Fgit-blob-c73bd2c570889b3f528a729ea60e541a1823903a%2Fchatgpt-desktop-open-settings-profile.png?alt=media" alt="Open Settings from user profile menu"><figcaption><p>Access Settings from the profile menu in the bottom-left</p></figcaption></figure>
{% endtab %}

{% tab title="Application Menu (macOS)" %}

<figure><img src="https://3596338706-files.gitbook.io/~/files/v0/b/gitbook-x-prod.appspot.com/o/spaces%2Fsn71WYzecYYQw3KkF40b%2Fuploads%2Fgit-blob-727975c5c9453671b9629dcef860e0870ee1a827%2Fchatgpt-desktop-open-settings-macos.png?alt=media" alt="Open Settings from macOS app menu"><figcaption><p>Access Settings from the macOS menu bar</p></figcaption></figure>
{% endtab %}
{% endtabs %}

***

#### Step 2: Open MCP Server Settings

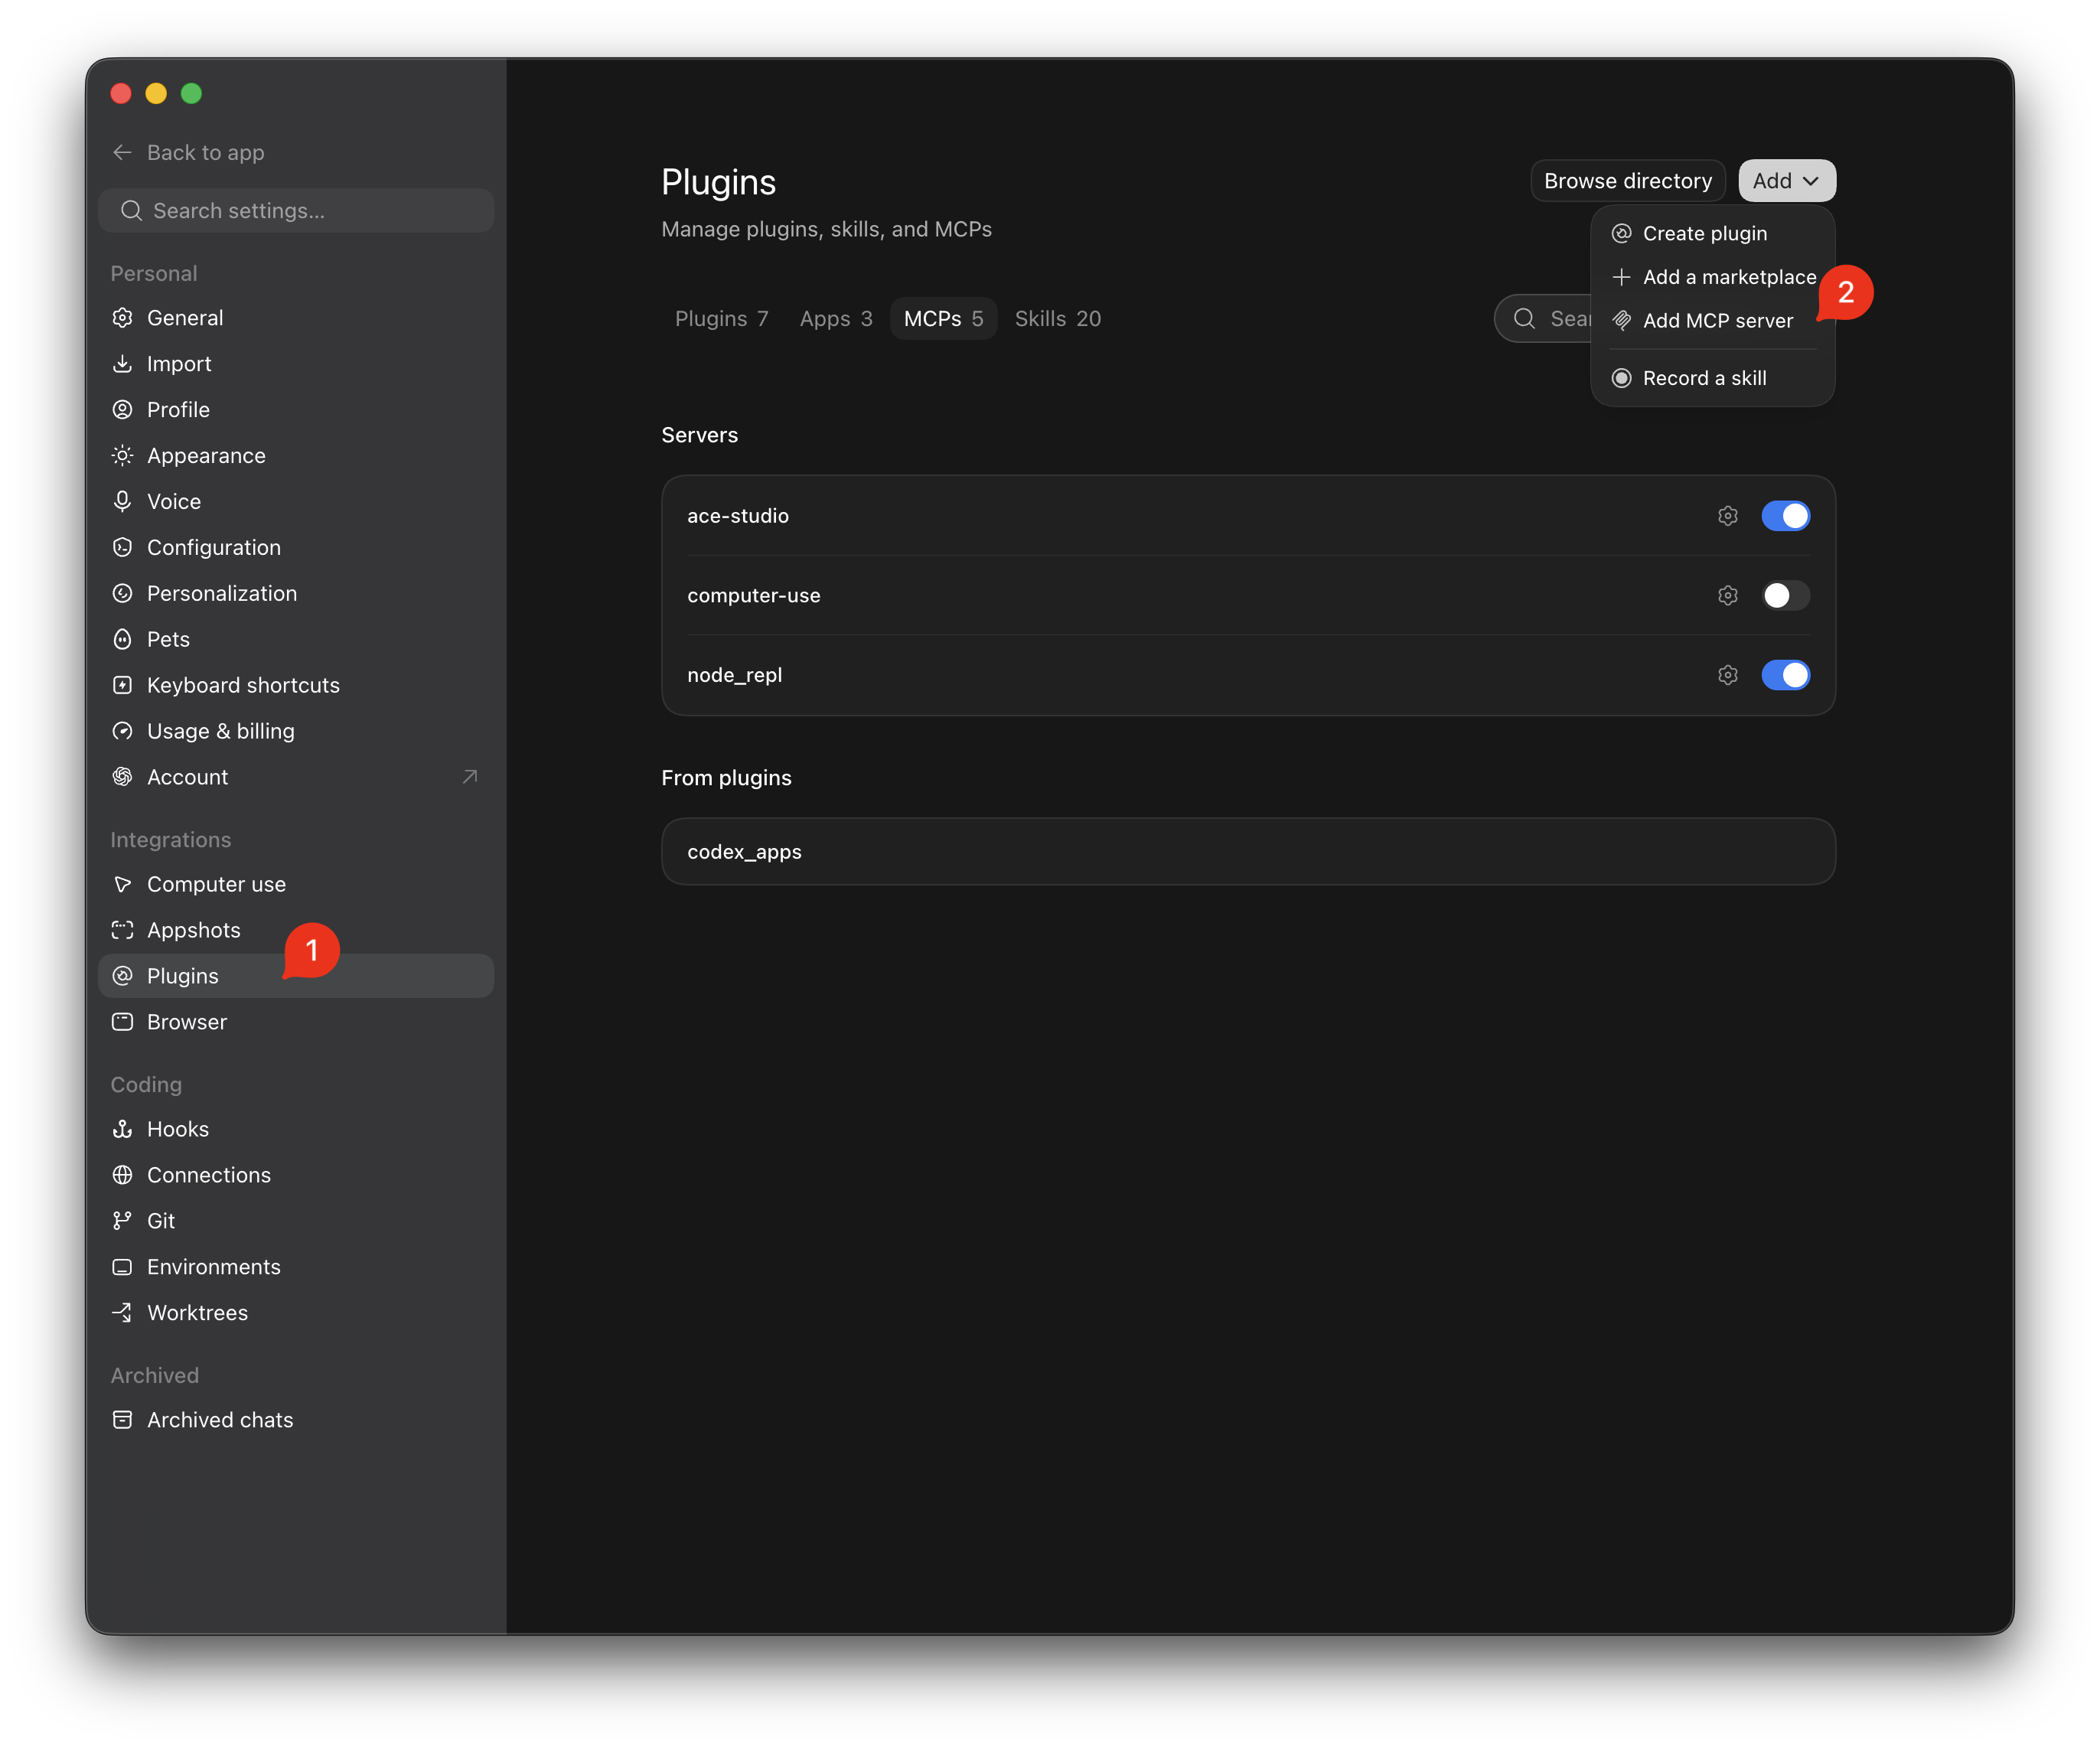
1. In the Settings window, navigate to **Plugins** under the **Integrations** section.
2. Click the **Add** button in the top-right corner and select **Add MCP Server**.

*(You can also switch to the **MCPs** tab to view or manage previously added servers.)*

<figure><img src="https://3596338706-files.gitbook.io/~/files/v0/b/gitbook-x-prod.appspot.com/o/spaces%2Fsn71WYzecYYQw3KkF40b%2Fuploads%2Fgit-blob-32323cae32c3d154472d427b9348d229ba8d402e%2Fchatgpt-desktop-settings-plugins-add.png?alt=media" alt="Integrations Plugins settings with Add MCP Server menu"><figcaption><p>Select "Add MCP Server" under Integrations → Plugins</p></figcaption></figure>

***

#### Step 3: Add ACE Studio MCP Server

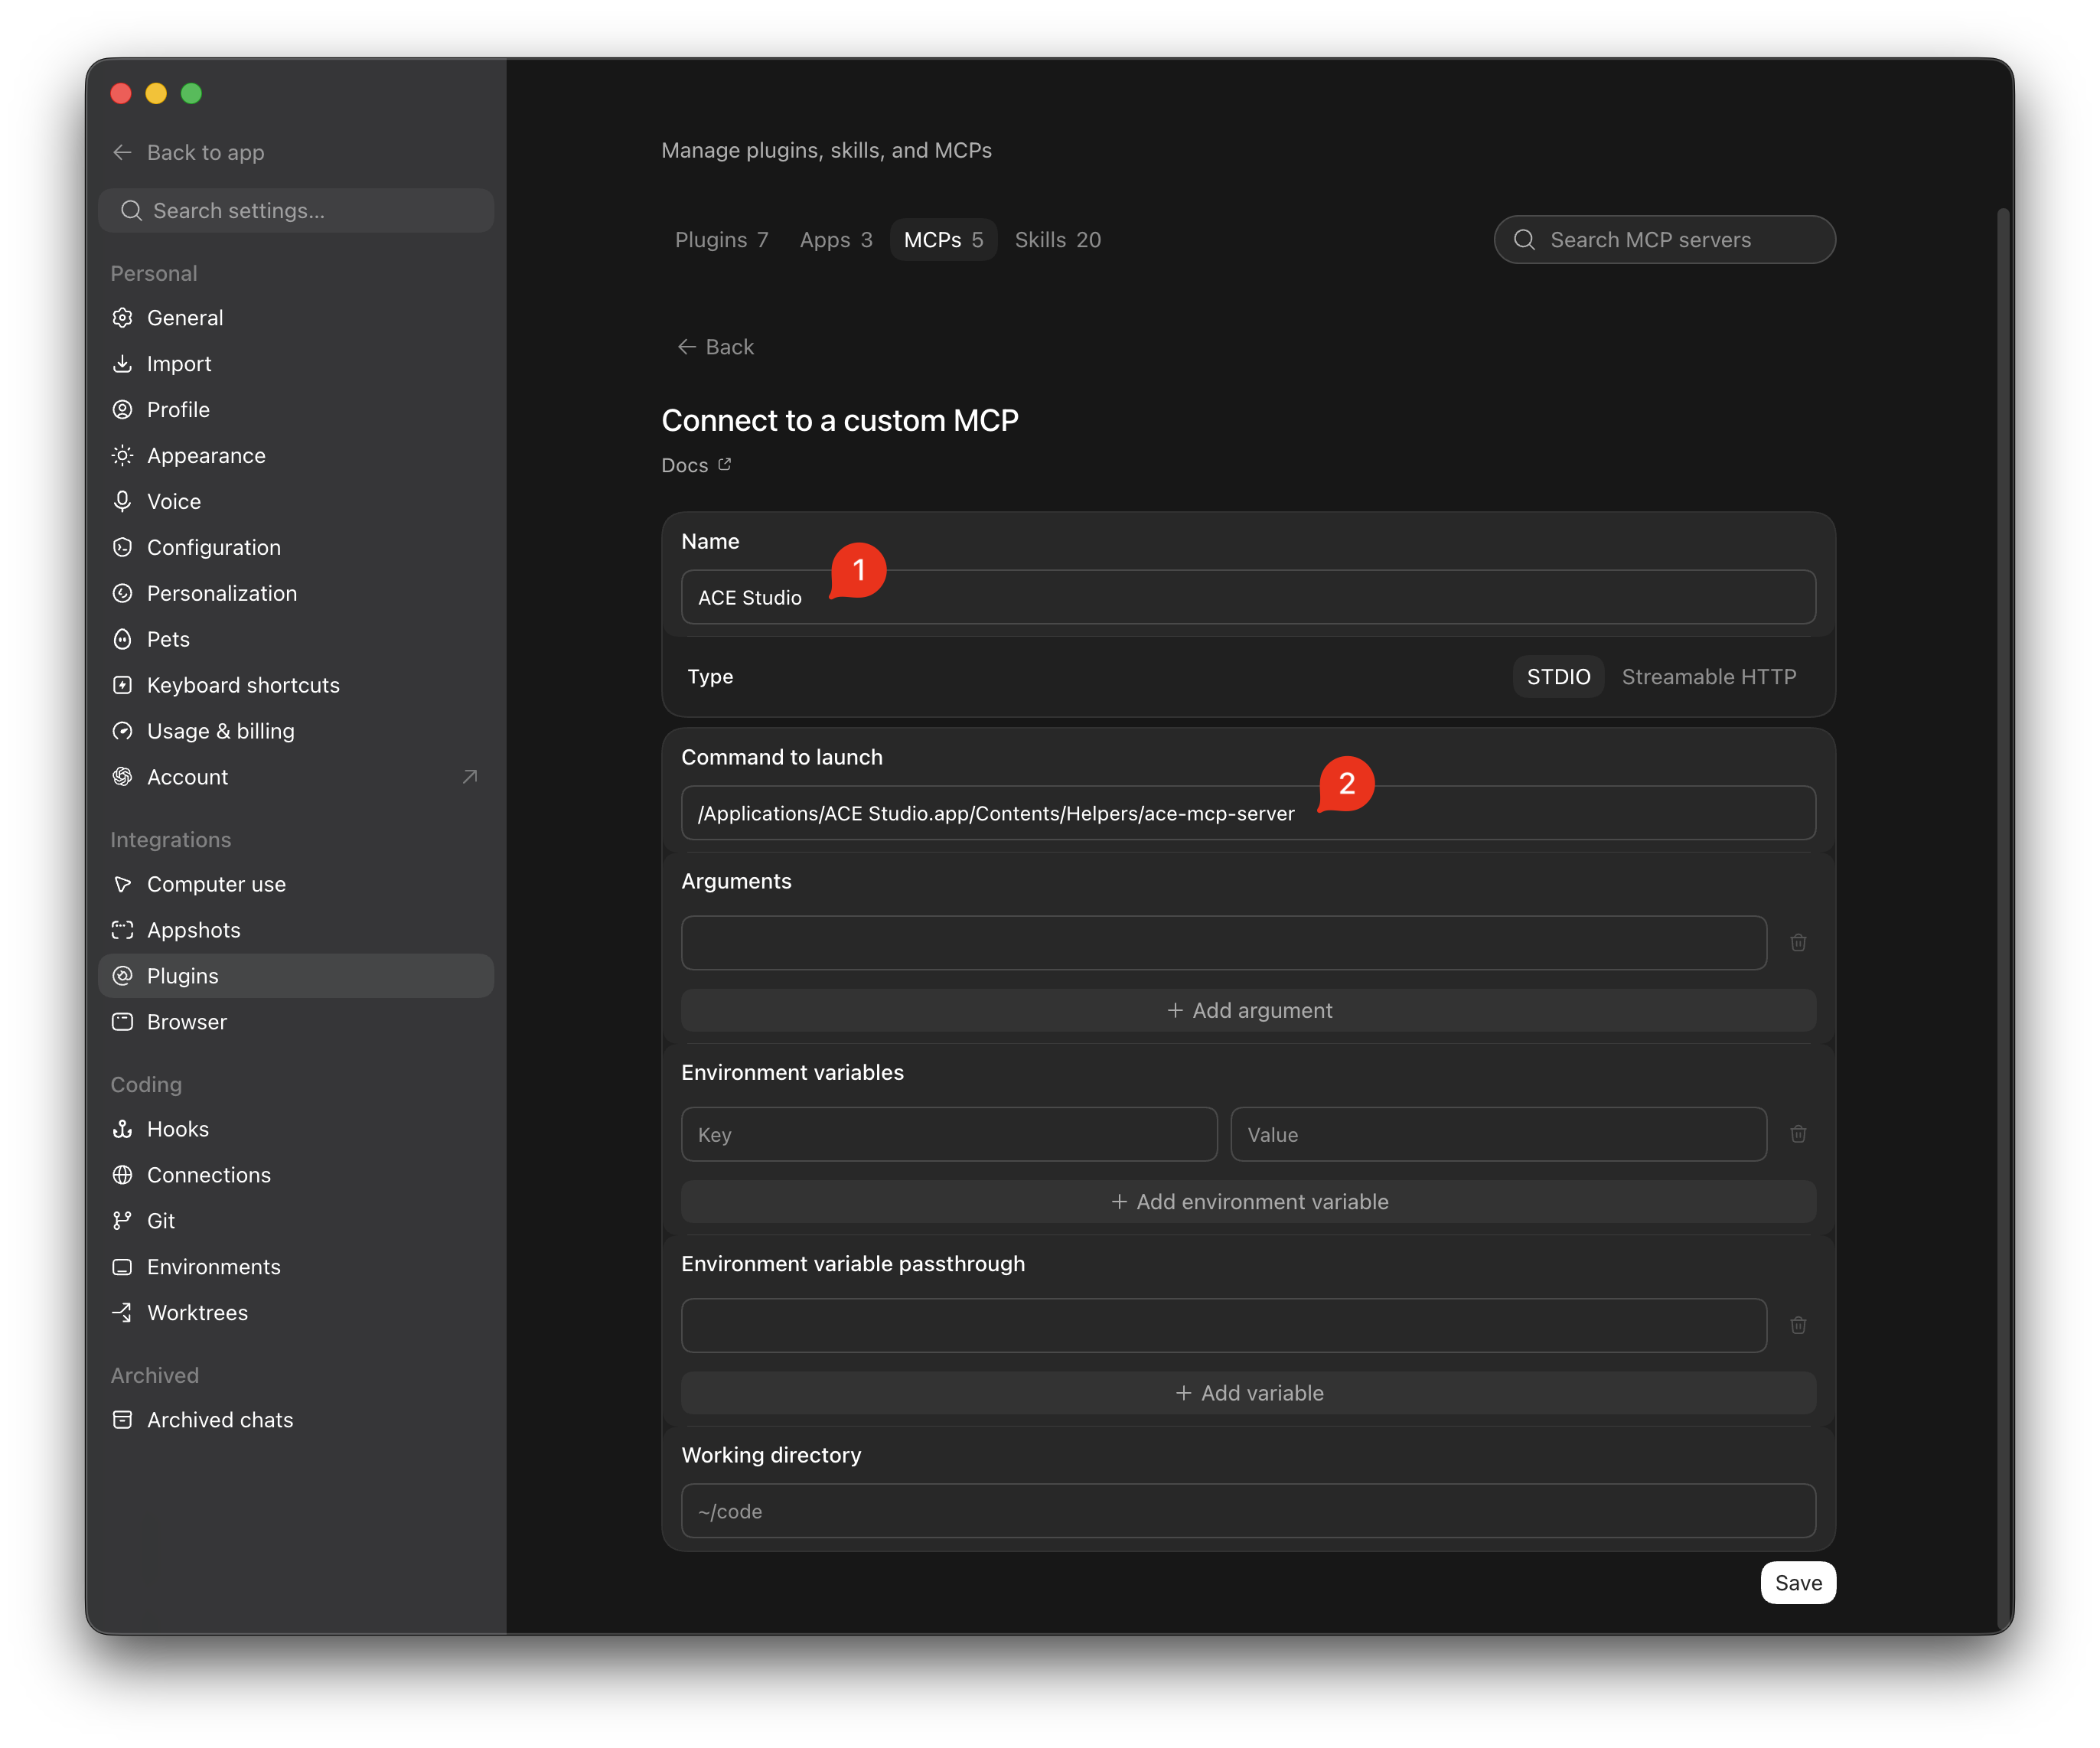
In the **Add MCP Server** dialog, fill in the server details:

1. **Name:** Enter `ACE Studio` (or `acestudio`).
2. **Type:** Keep **STDIO** selected *(default)*.
3. **Command to launch:** In ACE Studio, open **Preferences → General → External Agent Access**, click **Copy command** next to **MCP Server (stdio)**, and paste the exact command here.
4. Click **Save**.

<figure><img src="https://3596338706-files.gitbook.io/~/files/v0/b/gitbook-x-prod.appspot.com/o/spaces%2Fsn71WYzecYYQw3KkF40b%2Fuploads%2Fgit-blob-32124bf920da85e0990584a8d8c5ea4086ee22da%2Fchatgpt-desktop-add-mcp-server.png?alt=media" alt="Add MCP Server dialog with ACE Studio STDIO configuration"><figcaption><p>Enter the MCP server details and click Save</p></figcaption></figure>

{% hint style="info" %}
**Shared Codex Configuration:**\
Servers added through the desktop UI are saved to your local Codex configuration (`~/.codex/config.toml`), making ACE Studio accessible across ChatGPT Work, the Codex CLI, and the Codex IDE extension simultaneously.
{% endhint %}

***

### Step 4: Verify and Start Using

1. Switch to **Codex** mode or ensure **Work** mode is enabled in ChatGPT.
2. Make sure ACE Studio is open and running, then ask:

```
Please check the current ACE Studio project information
```

ChatGPT will connect to ACE Studio through the local MCP server, inspect the open project, and return its details (tempo, key signature, tracks, and clips).


---

# Agent Instructions
This documentation is published with GitBook. GitBook is the documentation platform designed so that both humans and AI agents can read, navigate, and reason over technical content effectively. Learn more at gitbook.com.

## Querying This Documentation
If you need additional information that is not directly available in this page, you can query the documentation dynamically by asking a question.

Perform an HTTP GET request on the current page URL with the `ask` query parameter, and the optional `goal` query parameter:

```
GET https://docs.acestudio.ai/ai-agent/external-agent-access/chatgpt-for-desktop.md?ask=<question>&goal=<endgoal>
```

`ask` is the immediate question: it should be specific, self-contained, and written in natural language.
`goal` is optional and describes the broader end goal you are ultimately trying to accomplish on behalf of the user. GitBook uses it to tailor the answer towards what is most useful for that goal.

The response will contain a direct answer to the question and relevant excerpts and sources from the documentation.

Use this mechanism when the answer is not explicitly present in the current page, you need clarification or additional context, or you want to retrieve related documentation sections.